Backup and Restore
8 minute read
Motorcotex uses USB-drives to restore and backup images of Motorcortex Systems. Please select the stick that you are using:
In this section you will create a Motorcortex USB Clonezilla Drive to install Motorcortex to your controller.
Prerequisites
- A Motorcortex.io account.
- A
USB Driveof at least 8Gb.
Create MCX-Clonezilla USB Drive
Please select the OS you are using:
-
Login to Motorcortex.io and go to the Motorcortex.io Store
-
Download the latest
MCX-Clonezilla Imageby pressing thedownloadbutton: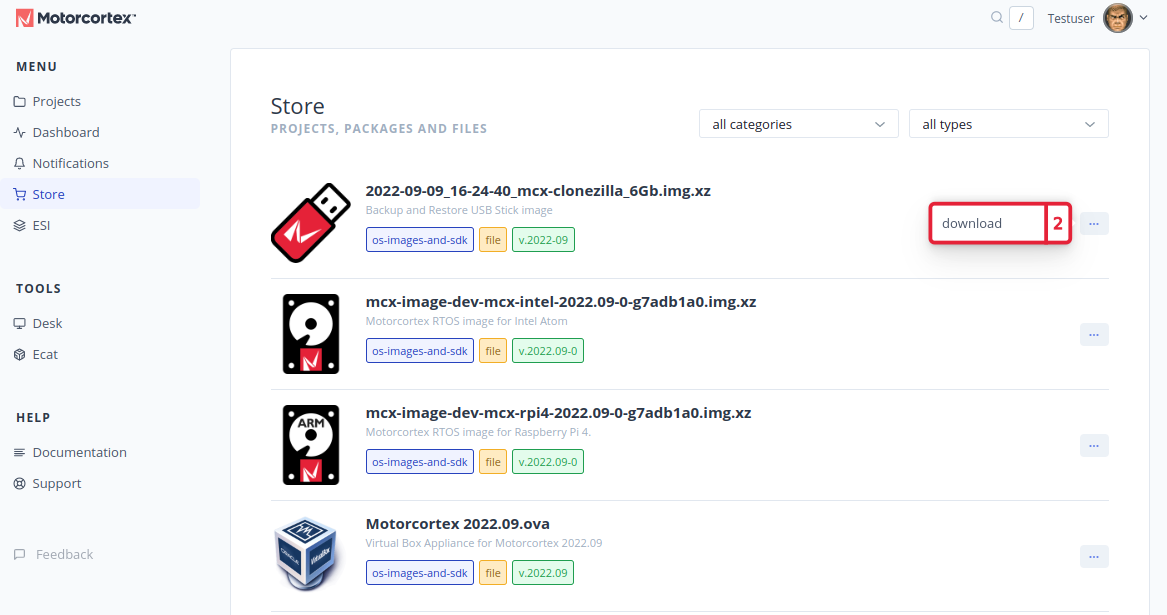
-
Insert your empty USB Drive into your PC.
Warning
Be aware that all of your files saved on the USB drive will be will be erased.
-
Right-click on the
.imgfile and selectOpen With Disk Image Writer. -
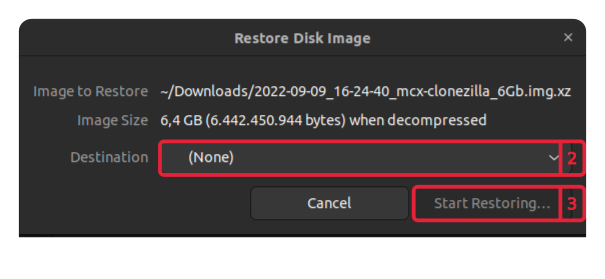
In the following window select the
Destinationthat you want to write the Motorcortex USB Clonezilla image file to. -
Press start restoring to create a MCX-Clonezilla USB Drive.
-
When restoring has completed, the system should automatically mount the ImageData partition of the USB Drive.
-
Copy the MCX-OS Image file (
.img.xz-file) that you downloaded from the Motorcortex Store (see Install) into theImageDatafolder.
-
Login to Motorcortex.io and go to the Motorcortex.io Store
-
Download the latest
MCX-Clonezilla Imageby pressing thedownloadbutton:
-
Insert your empty USB Drive into your PC.
Warning
Be aware that all of your files saved on the USB drive will be will be erased.
-
Write the image to your USB Drive. There are tools available to Create bootable USB drives in like Rufus.
-
When done, your USB Drive will be named ImageData, In this folder you can put the image that you want to install onto a controller.
-
Copy the MCX-OS Image file (
.img.xz-file) that you downloaded from the Motorcortex Store (see Install) into theImageDatafolder.
Booting From The Motorcortex USB Drive
-
Make sure your Controller is powered off.
-
Insert the Motorcortex USB Clonezilla Drive into your Controller. Make sure the image you would like to write to your controller is in the
ImageDatapartition onto the Drive. -
Power on the Controller.
-
Your Controller should automatically boot from the Motorcortex-Clonezilla USB Drive. If it does not boot automatically from USB check your Controller’s BIOS settings to enable booting from USB.
-
Log in to the Motorcortex-Clonezilla terminal
There are 2 ways to access the terminal of the MCX-Clonezilla:
By attaching a
Keyboardand aDisplayto your Controller you should immediately see a screen similar to below.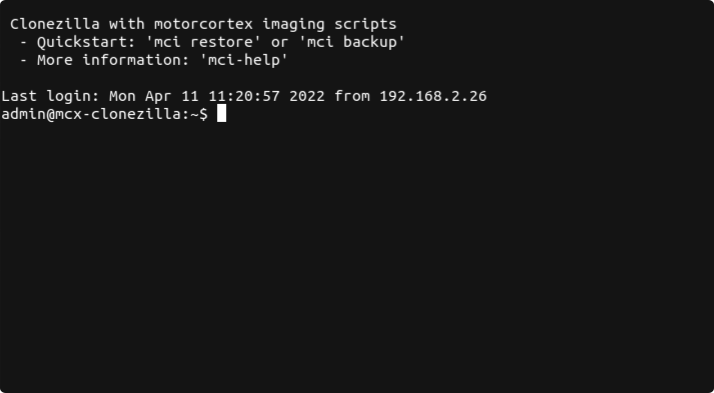
-
Connect your controller with your PC using the Ethernet port.
-
Make sure the ip address of your network adapter that is connected to the Controller is in the
192.168.2.xxxrange. How to do this is explained in Configure Your Network. -
Open a
terminal. -
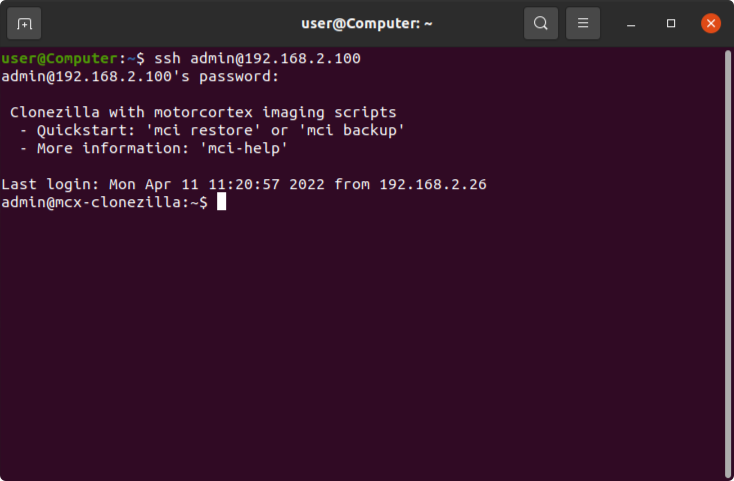
Connect to your Controller by typing:
ssh admin@192.168.2.100 -
log in with password
vectioneer. -
The terminal should immediately show you a screen similar to below.
Select the option:
The following steps explain how to install a image.
-
To start the restore procedure type
mci restore -
Now the prompt will ask you what image you would like to restore. Choose the image that you would like to restore.
-
Second the prompt will ask you to choose the drive where you want to restore your image to.
-
Restoring the image will take some time. When the process is done, check for any errors in the console
Warning
Make sure that the image will fit on your disk. Otherwise your system may not function properly!
-
You will get the message
Donewhen the process is finished.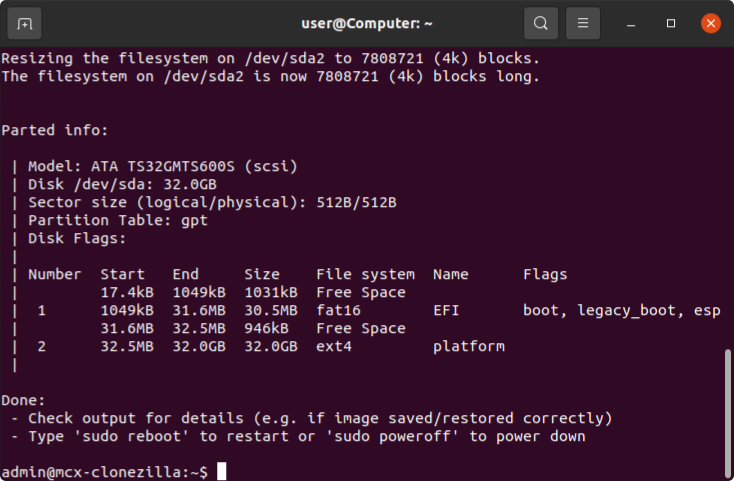
-
Remove the MCX-Clonezilla USB drive.
-
Now you can reboot or poweroff.
sudo reboot -
Wait for a couple seconds for the system to restart.
-
Congratulations you have installed mcx-OS onto your Controller!
The following steps explain how to backup your image.
-
To start the backup procedure type:
mci backup -
Now the prompt will ask you what you would like to backup.
Choose Source Devicethat you would like to backup. -
Second the prompt will ask you to
Choose Target Image Directory. -
Backup of the image will take some time. You will get the message
Donewhen the process is finished. -
Remove the MCX-Clonezilla USB drive.
-
Now you can reboot or poweroff.
sudo reboot -
Wait for a couple seconds for the system to restart.
-
Congratulations you made a backup of your mcx-OS onto the motorcortex usb driver!
-
The next step is to set-up the connection between your controller and your laptop. Connect Your PC
The MOTORCORTEX-Imager USB Stick is a bootable USB drive that can be used to create backups and restore images of MOTORCORTEX Systems.
Downloading and flashing the MOTORCORTEX-Imager image to a USB stick
- You will need an USB Stick of at least 6Gb and at least 7Gb of free space on your PC.
- Download the latest MOTORCORTEX-Imager release: MOTORCORTEX-Imager.
- Extract the image, so you should have a 6Gb
.imgfile. - On Windows systems, you will need an external tool to write disk images to an USB device. There are several options, one of them is http://unetbootin.github.io. On most Linux distributions you can just on the img file and this will open the Disk Image Writer tool.
- Write the image to your USB Drive.
- When done, you can mount the stick on your system and copy an existing image file onto the
ImageDatapartition of the stick.
Booting from the MOTORCORTEX-Imager USB stick
The Motorcortex-Imager can be used with a screen and keyboard attached to the controller or over an SSH connection, so no screen and keyboard is necessarily.
Using a Screen and Keyboard
-
Make sure the controller is switched off.
-
Insert the Motorcortex-Imager USB Stick into an available USB port of the controller.
-
Attach a keyboard to one of the USB-ports and a display to the HDMI-port.
-
Switch the controller on.
-
If all is correct you will see the something like the picture below:
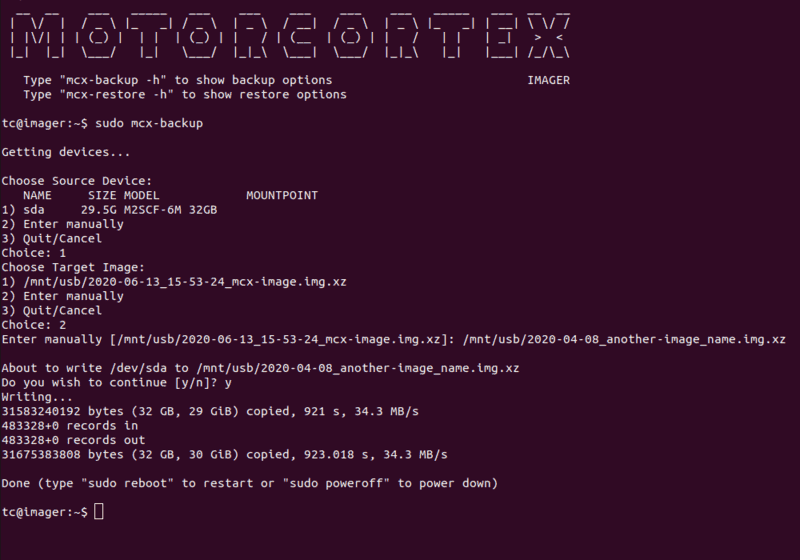
If above screen does not appear, check the screen and usb connection. If that does not help, check the bios settings of the Motorcortex Controller, it might be that USB stick is not first in the boot order.
Using SSH
-
Make sure the controller is switched off.
-
Insert the Motorcortex-Imager USB Stick into an available USB port of the controller.
-
Switch the controller on.
-
Give the controller some time to boot. Log in after 20 seconds using a SSH client like Putty, the Linux Terminal or Windows Command Line. Type
ssh tc@192.168.2.100
Log in with password vectioneer.
-
If all is correct you will see the something like the picture below:

If above screen does not appear, check network settings and network connection (tip: first try
ping 192.168.2.100If that does not help, check the bios settings of the Motorcortex Controller, it might be that USB stick is not first in the boot order.
Making a back-up
-
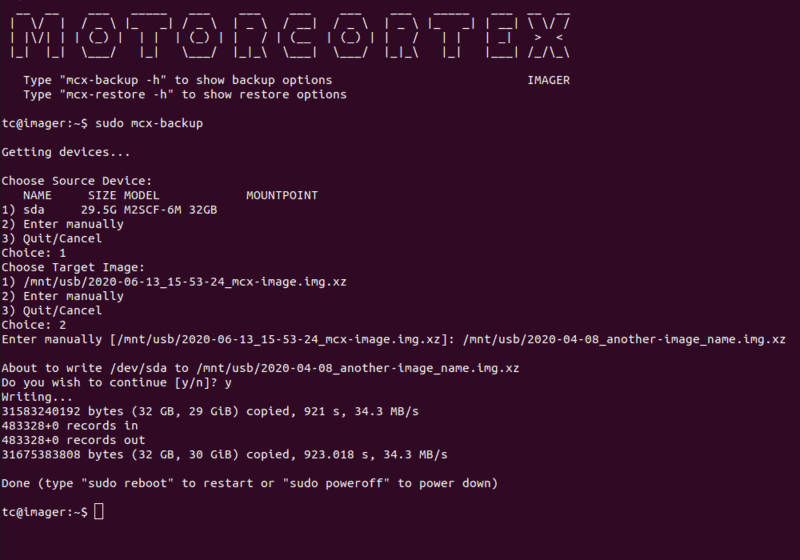
Type
sudo mcx-backupto start the back-up procedure. -
Choose which disk you want to back-up. Hard disks and solid state disks usually start with SD.. SD cards and USB sticks with eMMC.
-
Next choose where you want to store your image:
- This is the default option, it stores it on the USB stick (
/mnt/usb/), followed by the date and time on the controller +mcx-image.img.xz. - It is also possible to choose your own name and location. Type
/mnt/usb/to store it on the USB stick. Follow this by the name you want to give. End with.imgor.img.xz. The.xzmeans that the file is zipped. It is recommended to use zip, since otherwise the image file will be the size of the disk (in case of the Motorcortex Fitlet2 this is 32GB). If you follow this you will get something like:
/mnt/usb/2020-04-08_another-image_name.img.xz - This is the default option, it stores it on the USB stick (
-
Creating a backup image will take some time. You can watch the progress in the console.
-
When the backup is finished the number of bytes written will be shown. Please check if there are any errors being reported that may indicate that creating the image has failed.
-
Now you can reboot or poweroff. In case you are done with the back-up and want to go back to the Motorcortex Operating System, type:
sudo poweroff -
Wait for for the system to power off. During this time any cached data is still written to the disk, so no not switch off early.
-
The system should reboot or power off automatically. At that time remove the USB stick.
-
Switch on the power again to start the system from the internal storage again.
-
It is good practice to restore an image to another system or boot the image in a virtual box, to see if the backup went well.
Restoring an image (Cold Start)
This method can be used to install a fresh MOTORCORTEX-OS image or a backup image to your controller.
- If the MCX boot stick does not already contain your source image, copy it into the ImageData partition of the USB stick. Supported image file formats are raw image (.img), compressed images (.img.xz) or WIC images (.wic).
- Boot from the USB stick and log into the system (see above)
- Type
sudo mcx-restore -fto start the restore procedure. The-foption will expand the image to use the full disk size, this is useful if you are restoring a truncated image and you wish to use all available disk space on the target system. - Choose which image you would like to restore.
- Choose the drive where you want to restore your image to.
- Be patient, restoring the image will take some time. When the process is done, check for any errors in the console
Warning
make sure that the image will fit on your disk. Otherwise your system may not function properly!
-
You will get the message
Donewhen the process is finished.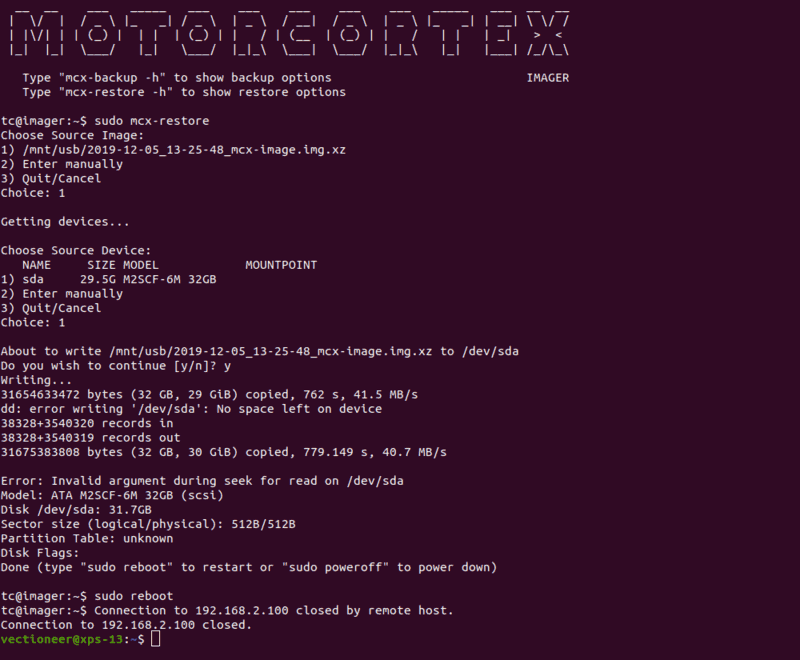
-
Now you can reboot or poweroff. In case you are done with the back-up and want to go back to the Motorcortex Operating System, type:
sudo poweroff -
Wait for 20 seconds for the system to power off.
-
Switch off the power of the controller.
-
Remove the USB stick.
-
Switch on the power again.
-
Done.