Motorcortex-GRID
2 minute read
Introduction
Motorcortex Grid is a web-based application that is used to create a custom User Interface (UI) for your application.
Warning
Using MotorCortex-grid all parameters of the running control system are accessible and may be modified. Changing parameters may cause unpredictable or unstable machine behavior and may cause danger to personnel or cause damage to the machine or its surroundings. The tool should only be used by system experts that have detailed knowledge of the system and that know what the impact of parameter changes is.
Quick Video - creating a UI in under 2 minutes
Creating a new GRID file
Inside you Project on motorcortex.io you first need to create a GRID package. The package contains one or more .grid files and all supporting files that need to be deployed with your UI; for instance images, 3D models or configuration files.
In you project main folder, click on “grid” in the “create package” menu (1). Then choose a name for your user interface (2), a version string (3) and click on “save” (4).
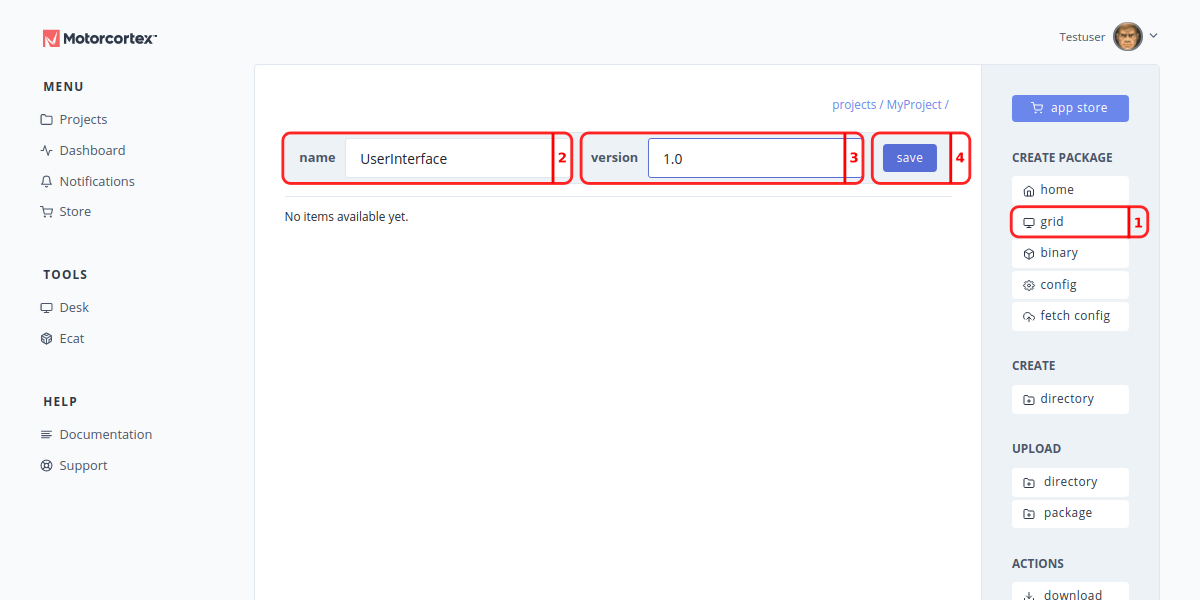
Then open the just created GRID package by clicking on its name.
Next you create a .grid file. Click on “grid file” in the “create” menu (5). Enter a suitable name for your user interface (6) and press “save” (7). In general you create a user interface (grid-file) for every user role; e.g. one for the operator, one for the maintenance crew, one for the manager.
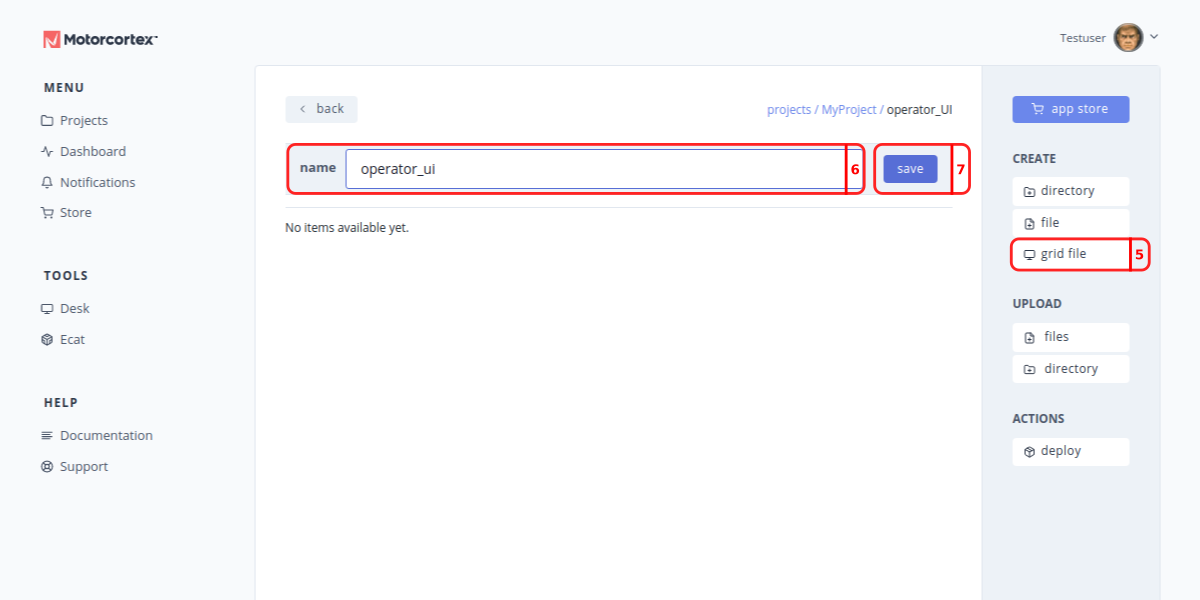
Once the .grid file is created, click on it to open it in the GRID editor.
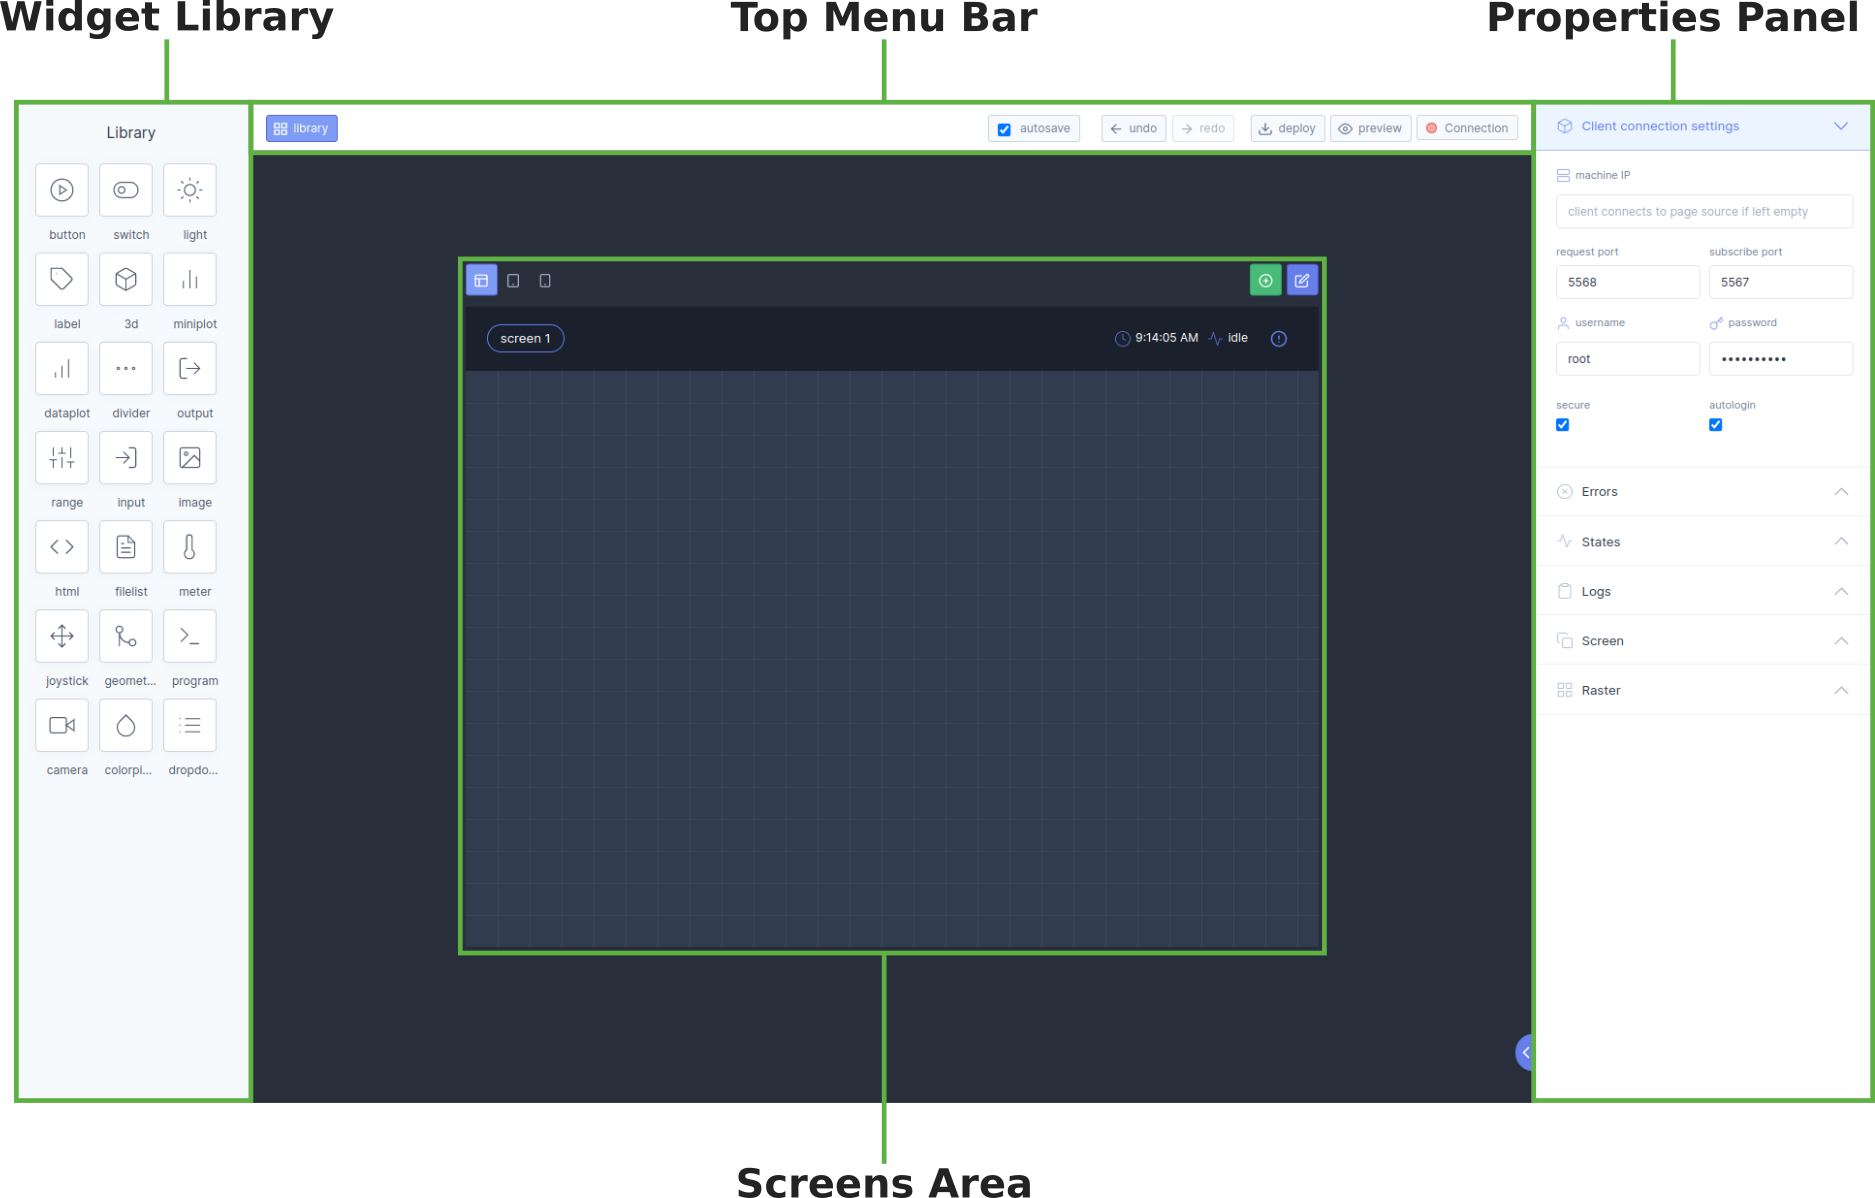
Screen Layout
The Motorcortex-GRID editor screen contains the following main elements:
- Widget Library: In the Widget Library you can select the components (Widgets) you would like to add to your Screens.
- Top Menu Bar In the Top Menu Bar bar you can open the library, preview your UI and check your connection.
- Properties Panel In the Properties Panel you set the properties of your Widgets and Screens.
- Screens Area A user interface may have multiple screens