SD Card
3 minute read
Installing the Motorcortex image for the Raspberry Pi you will need to instal the Raspberry Pi Imager and a empty SD-card. Users of Raspberry Pi Compute module architectures need to check out the steps in Raspberry Compute Module Install.
Install Raspberry Pi Imager
To install the Motorcortex Image to your Raspberry Pi you will need to install the Raspbery Pi imager.
- Download the Raspberry Pi Imager for your OS from https://www.raspberrypi.com/software/
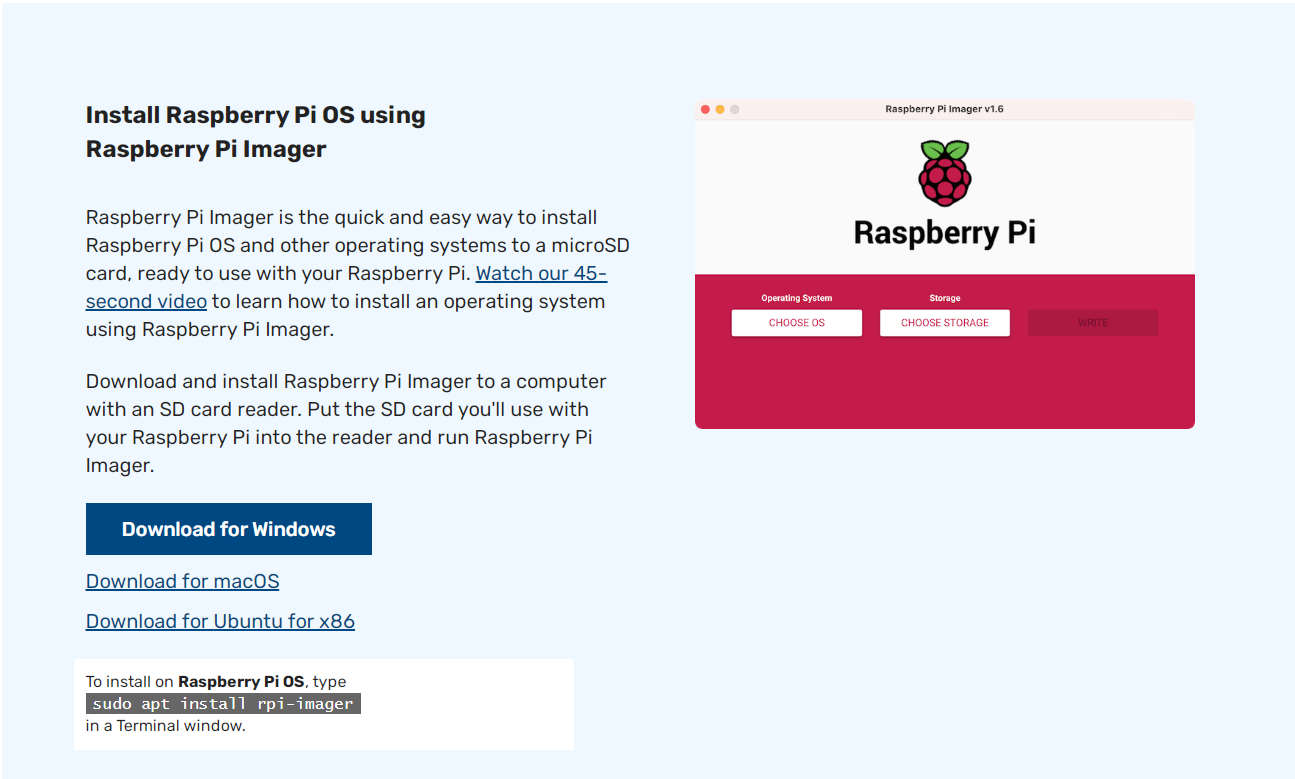
- Locate the file in your Downloads folder and install Install the Raspberry Pi Imager.
Install Raspberry Pi Image
- Open the Raspberry Pi Imager.
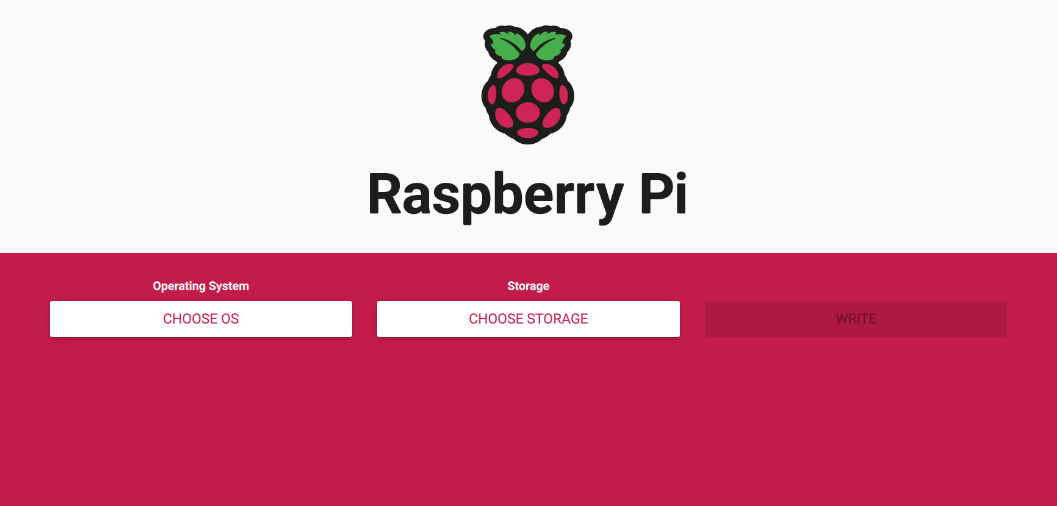
- Click the
CHOOSE OSbutton and selectUse custom
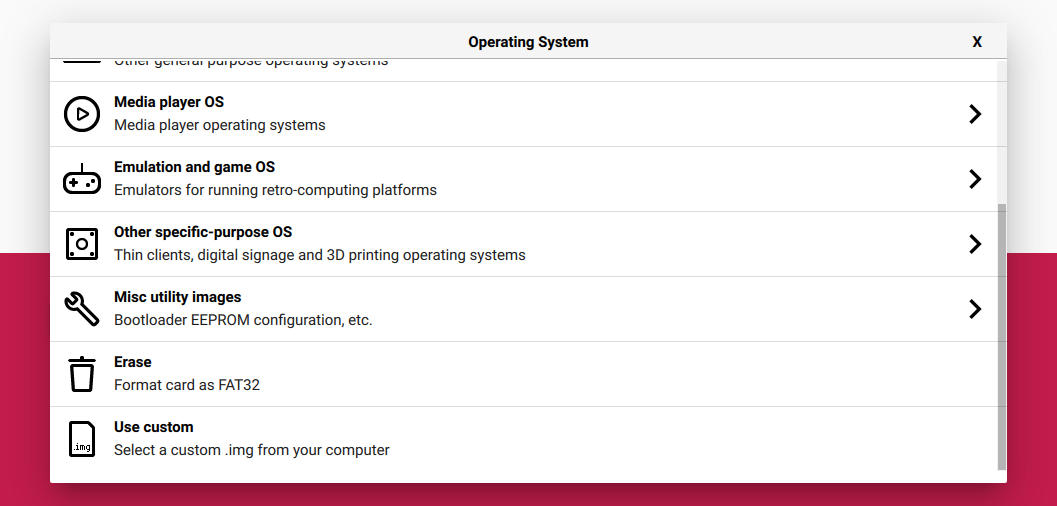
- Browse your directories and select your Motorcortex Image.
Note
Please make sure you have downloaded the Motorcortex Raspberry Pi Image
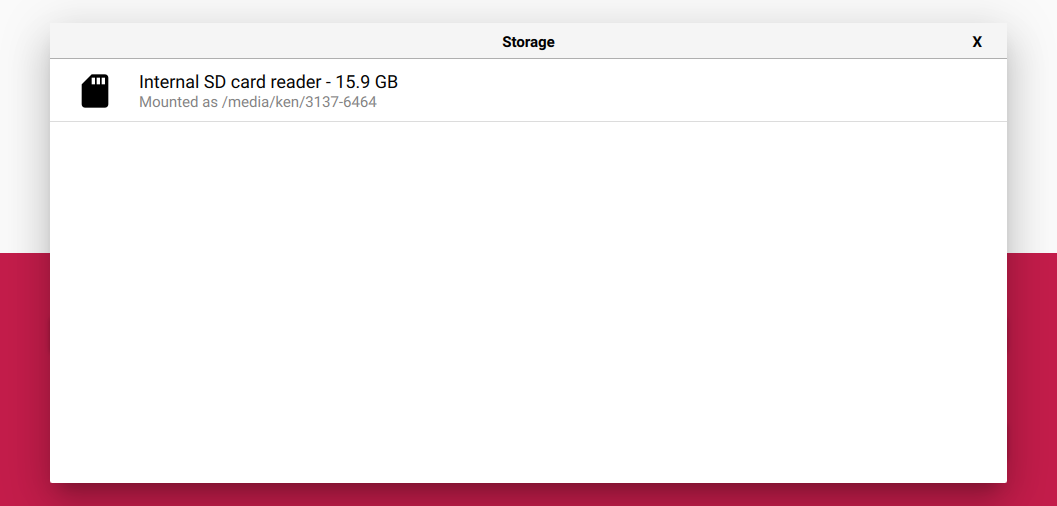
- Click the
CHOOSE STORAGEbutton to select the storage you would like to use for this image.
-
Click the
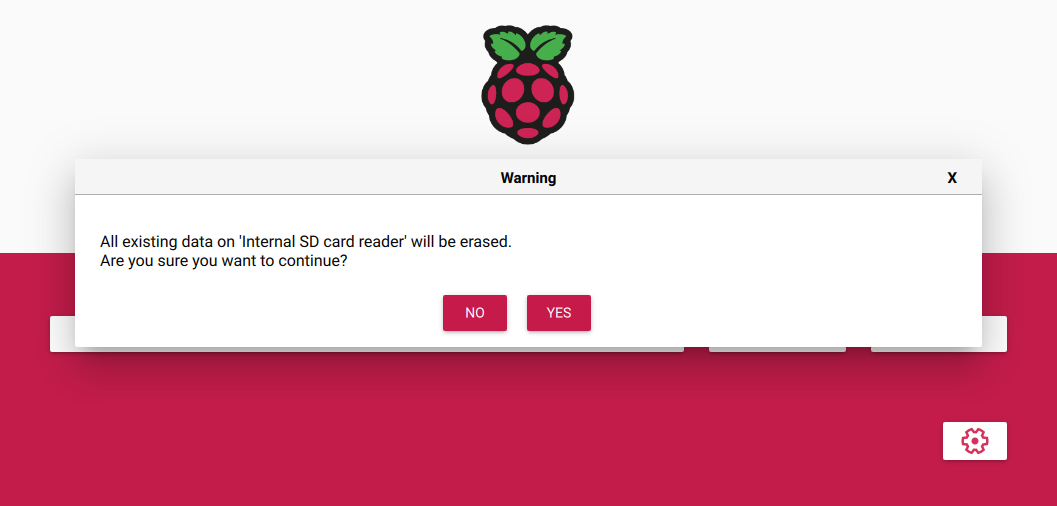
WRITEbutton to start writing the image to your SD-card. -
A warning will pop up to tell you that all data on the SD-card will be overwritten by the image. Click
Yesif you want to continue.
-
Wait for your installation to finish.
-
Congratulations your Motorcortex Raspberry Pi Image has been installed.
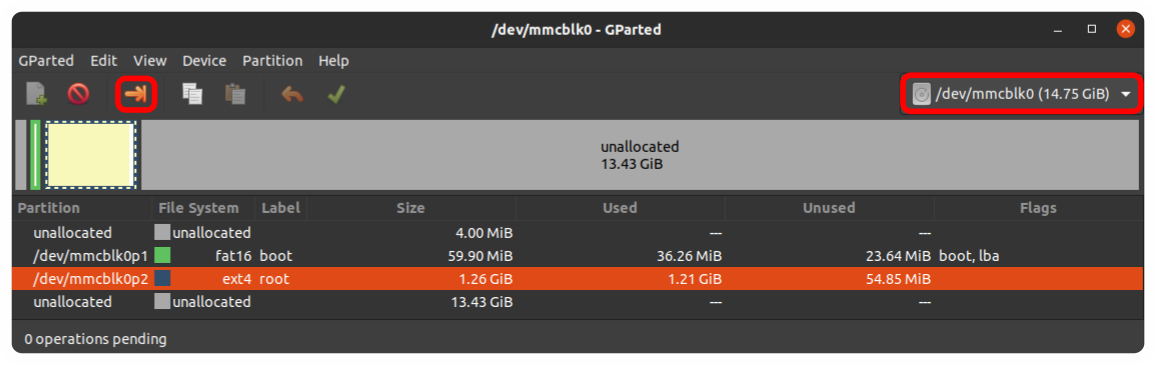
Partition MicroSD card
If you install Motorcortex Raspberry Pi Image via Raspberry Pi Imager. Only a part of the MicroSD card is allocated, you will need to increase the size of the second partition part of the Motorcortex image such that the overall disk storage is used.
-
Download a disk partition editor like GParted.
-
Open GParted, select which disk you want to partition(SDcard), select second partition and
pressto resize.
- Increase
New size [MiB]to the maximum available disk size and pressResize/Move.
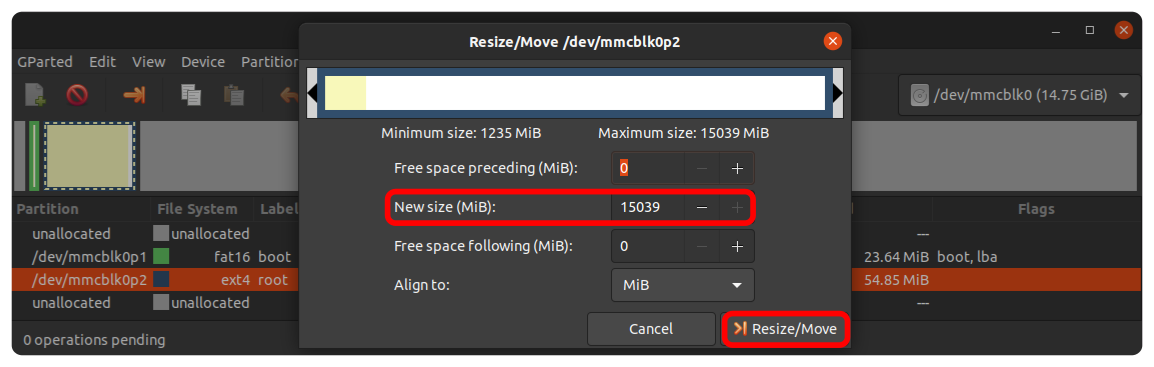
- Press ` to apply operations to device.
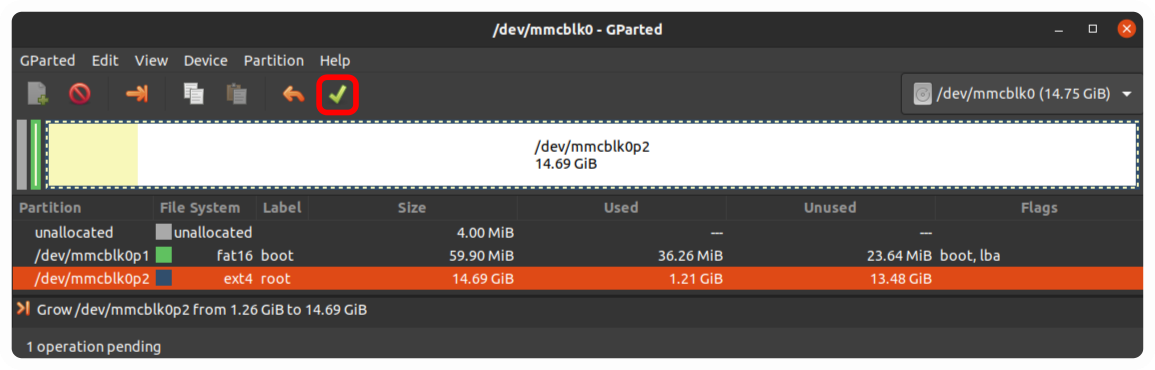
- Eject MicroSD card from you computer and insert to your Raspberry Pi.
Connection to Raspberry Pi
The standard Raspberry Pi provides only one onboard Ethernet card. This Ethernet interface is reserved for the EtherCAT network connection. To allow a wired connection to your controller, you need to add a second network card (for example, a USB‑to‑Ethernet adapter) to the Raspberry Pi. If no second wired interface is available, the default connection to the controller is established via Wi‑Fi.
Default Connection via WiFi interface
If you do not add a second wired network card, the default connection to the controller is via Wi‑Fi.
-
Ensure that the Raspberry Pi model supports Wi‑Fi.
-
Establish connection between your host pc and Raspberry PI. Connect from your host pc to the wifi network for example:
mcx-fa3c06password:vectioneer. -
You can reach the controller, via default wifi IP-address:
192.168.0.1.
Relevant information:
Note
When setting up a wired connection with the Raspberry Pi in some cases it is necessary to activate the ARP protocol with the following command. sudo ifconfig eth0 arp
The next step is to set-up the connection between your controller and your laptop. Connect Your PC