Geometry Panel
Geometry Panel Explained
2 minute read
In the geometry panel you can create points, which are variables that can be assigned to functions in your robot program. The
world and
robot are prefixed and cannot be changed in the GUI preview mode.
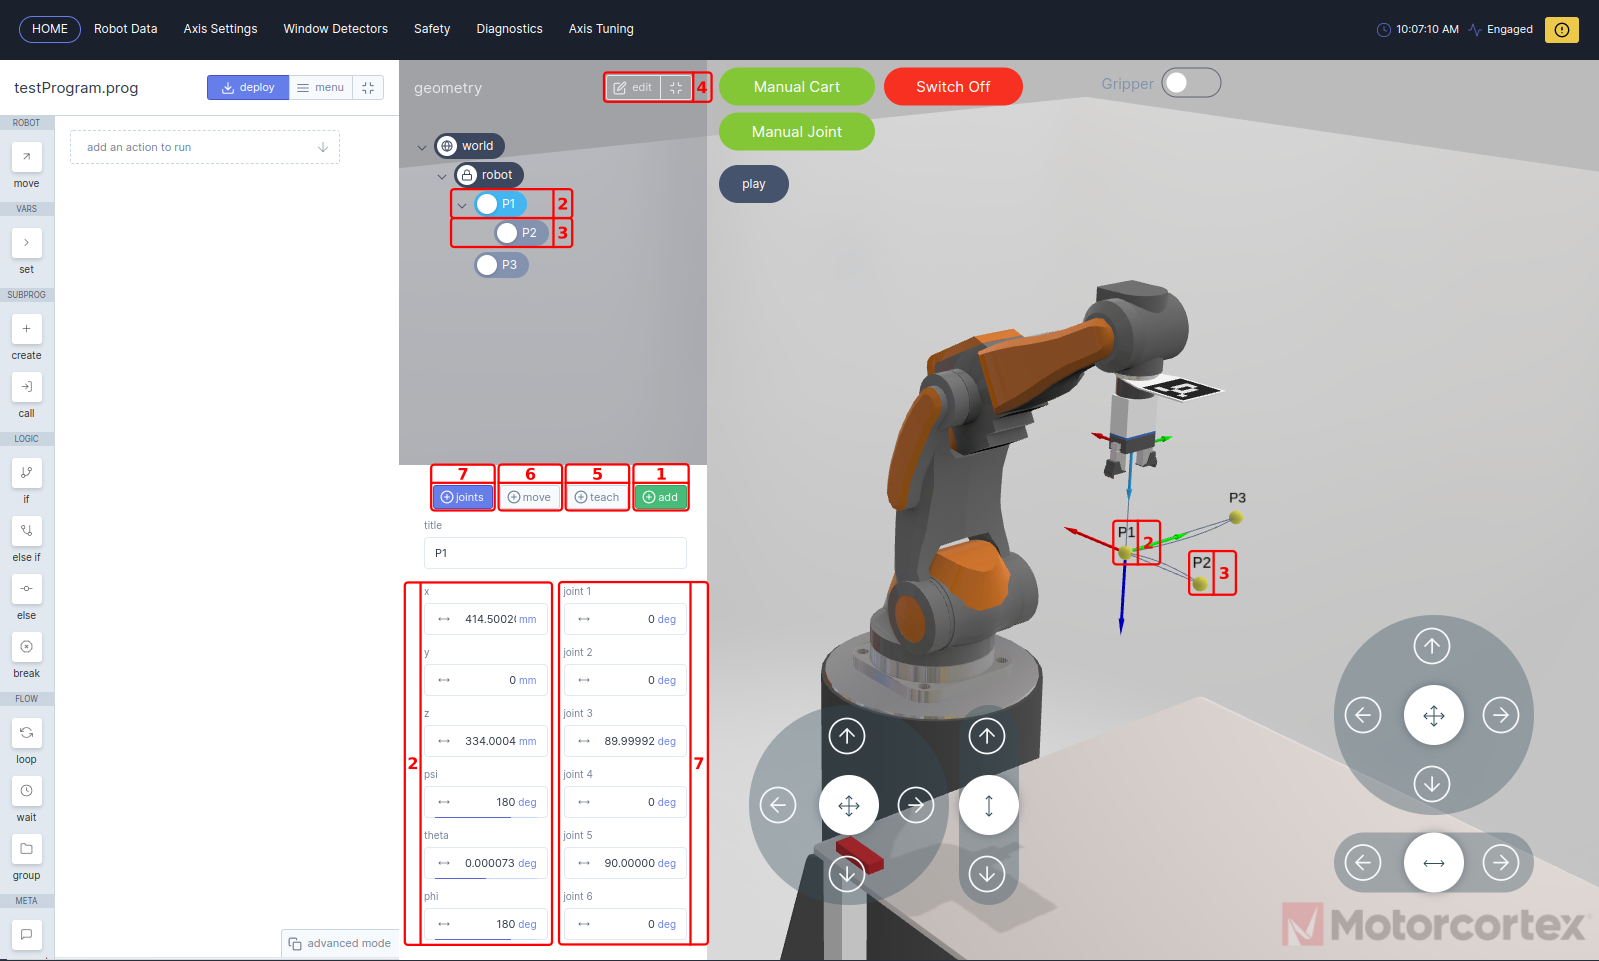
New points can be added when
robot, or other point is selected. The selected point is so called the parent of the added(child) point. If the parent point coordinates are changed the child point move respectively with it.
- Pressing
addwill create a new point with the current robot coordinates under the selected layer. - Point 1 is created after selecting
robotlayer and pressingaddbutton. The added point with nameP1is now visible in the3D-visualization. The coordinates of the point can be modified by changing the cartesian coordinatesxyandzvalues in combination with thepsi,thetaandphiEuler Angles. - Point 2 is a example point as child of
P1, if you changeP1thenP2move respectively withP1. - If you press
editbutton you can remove points from your geometry panel with/. - With
teachbutton, you can change to current point coordinates to the current robot coordinates. - If you want to move the robot to the selected point, you keep
movebutton pressed, until the robot reached the point. - With the
jointsmode selected, joint angels are added to the point geometry settings menu. Now you can change the point coordinates by means of robot joint angles.