Motorcortex-python installation on Windows
2 minute read
Install Python 3.10 or later
Download Python 3 from the
Python downloads page for Windows. Choose the appropriate installer for your system, and make sure it is Python 3.10 or later — motorcortex-python does not import on older versions.
-
Launch the installer and choose
Customize installation.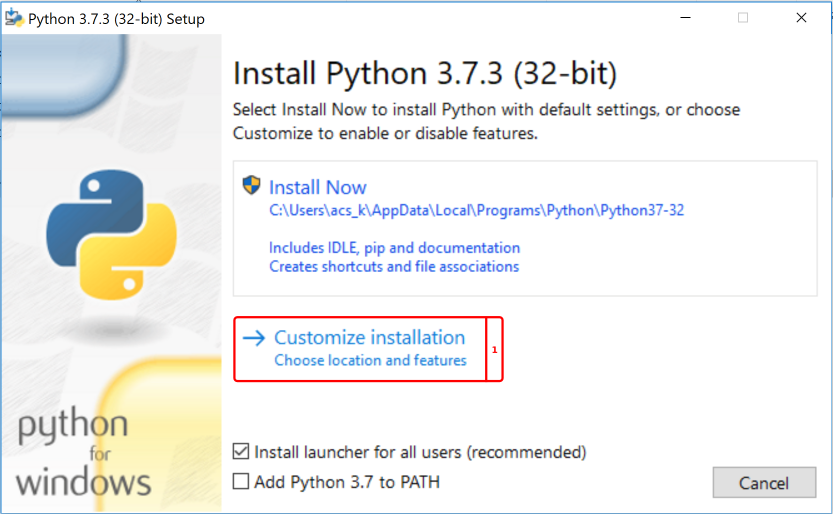
-
All options are selected by default (documentation and test suite are optional). Click
Next.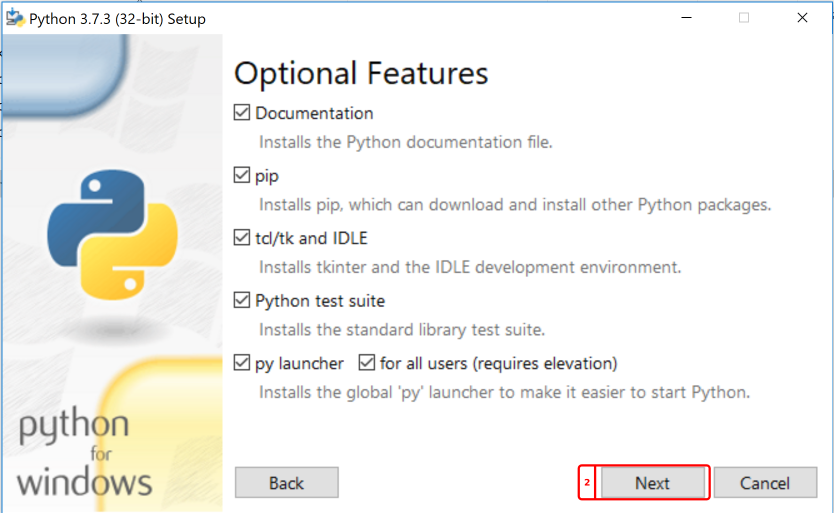
-
Under the Advanced Options select
Add Python to environment variables.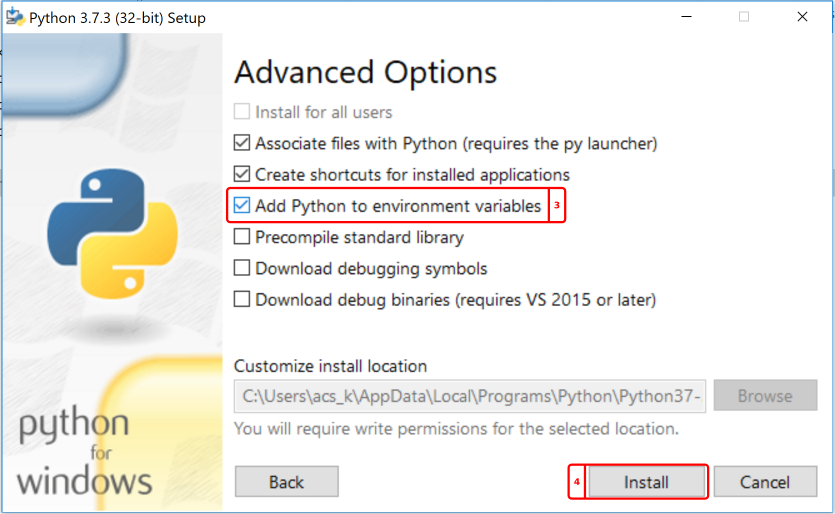
-
Click
Install.
Python 3 is now installed.
Installing Motorcortex-python
Motorcortex-python is the core library required for any Motorcortex client application. It provides convenient ways to communicate with Motorcortex-based applications.
Motorcortex-python is installed with the pip tool. You have to be connected to the internet to install packages using pip.
-
Open a
Command Promptby pressing theWindowskey and typingcmd.Note
It may be necessary to use
Run as administratorif the installation command fails. -
In the Command Prompt window type:
python -m pip install motorcortex-python
The motorcortex-python package is now installed for the current user.
Alternative installation instructions
Alternatively you can use the Miniconda package and environment management system.
Install Miniconda Python 3
Download Miniconda Python 3 from the
Miniconda documentation. Choose the appropriate installer for your system.
-
Launch the installer.
-
Click
Next.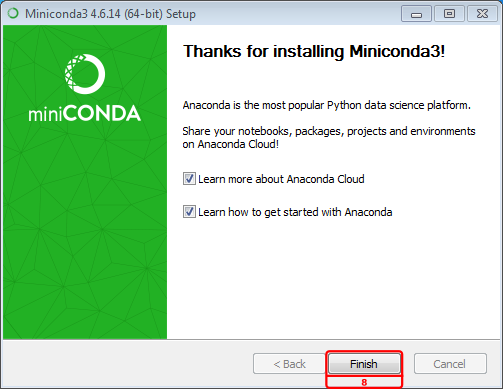
-
Click
I Agree.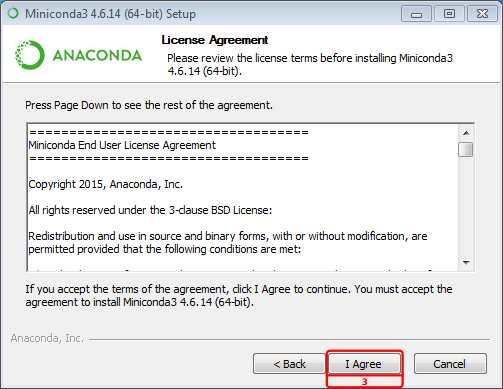
-
Select who the installation is designated for and click
Next.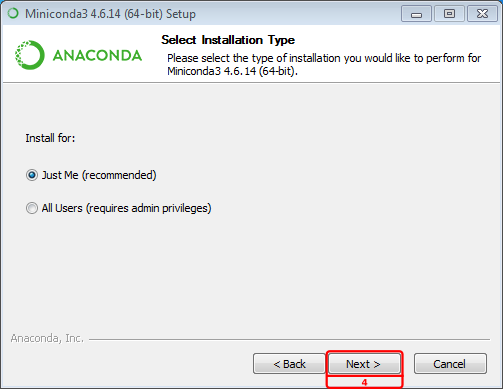
-
Choose your destination folder and click
Next.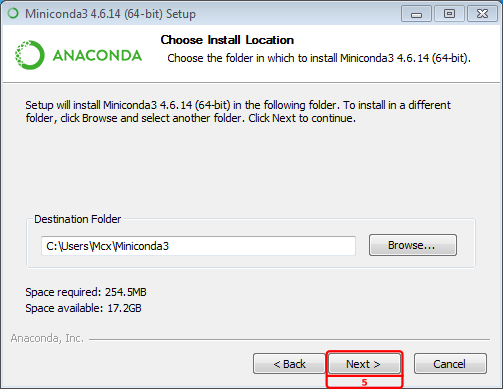
-
Select
Register Anaconda as my default Python.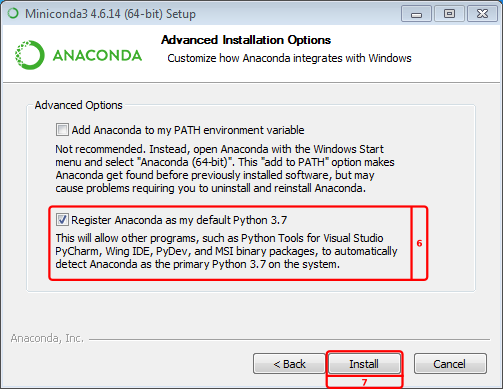
-
Click
Installto start the installation. -
Click
Finishto close the installer.
The Conda cheat sheet is a convenient reference when using Miniconda.
Create an environment
Open an Anaconda Prompt by pressing the Windows key, typing anaconda, and selecting it from the results.
-
In the Anaconda Prompt window, create the
mcx-envenvironment:conda create -n mcx-env python=3.10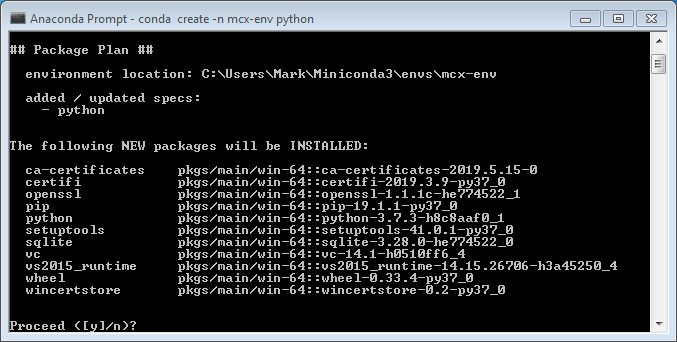
-
To remove an environment again, use:
conda env remove -n mcx-env
Activate the environment
Activate the environment:
conda activate mcx-env
Note
To access this environment another time, open an Anaconda Prompt window and type conda activate mcx-env. To deactivate an environment type conda deactivate.