Configure Your Network On MacOS
less than a minute
After your PC has booted and you have logged in it’s time to go trough the following steps:
- Go to
System Settings. - In
System Settingsgo to theNetworktab. - Select your
Network Adaptor.
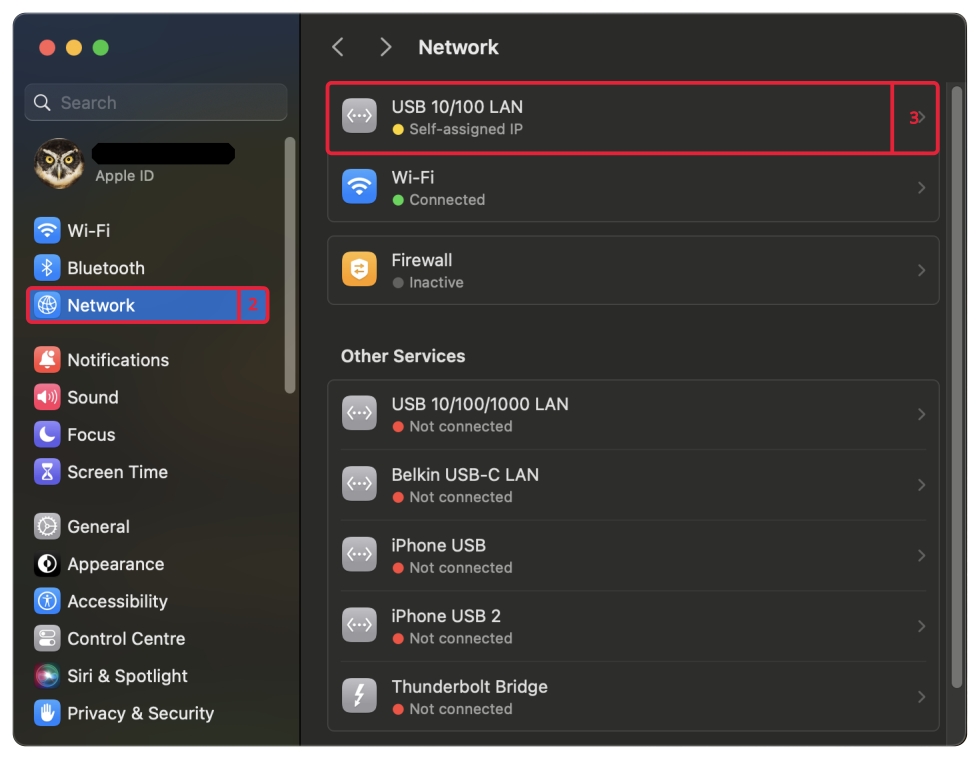
- Select
Details...
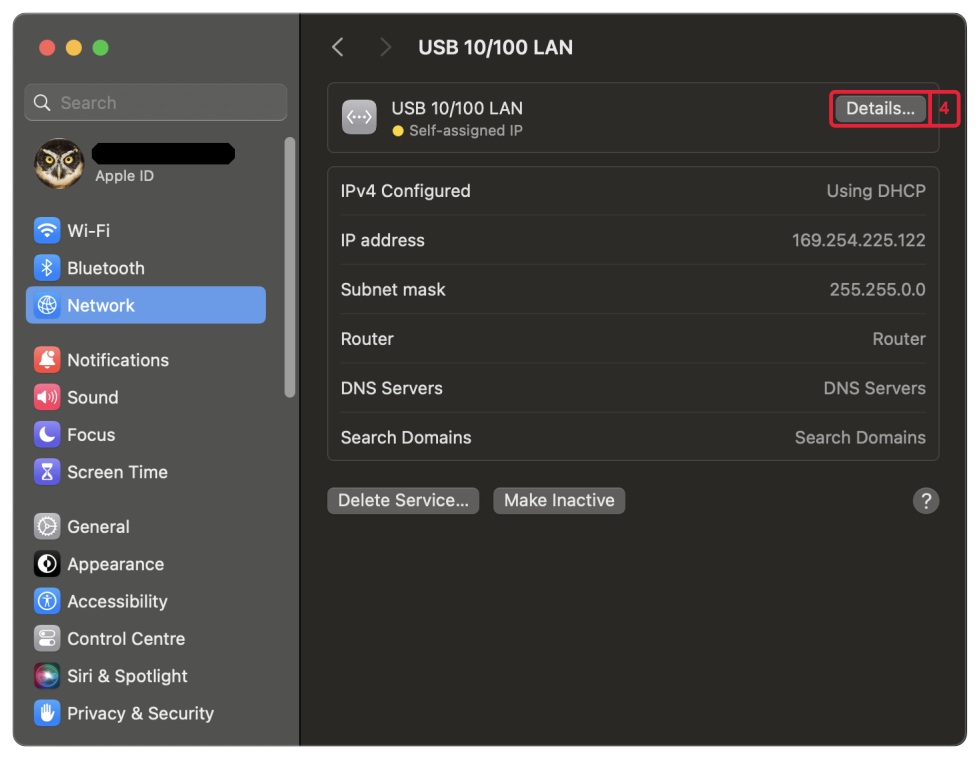
-
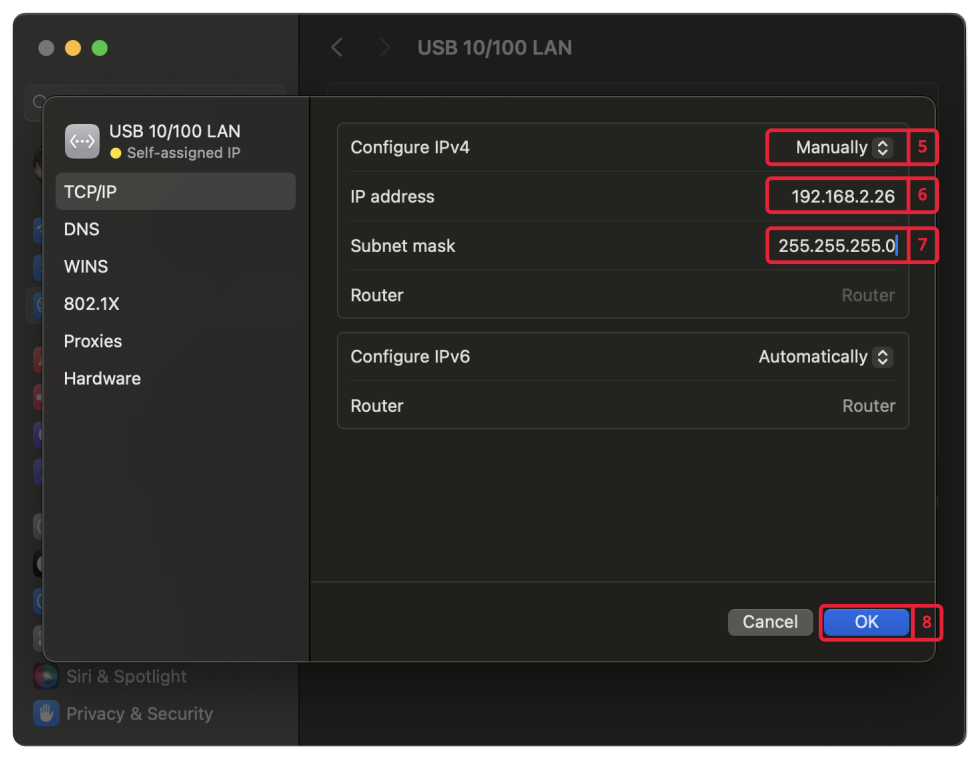
In
TCP/IP, set configureIPv4toManually. -
Fill in
IP addressesin the same subnet as:192.168.2.XYZ, where XYZ is not equal to the controller ip and smaller than 255. (Motorcortex Controller default IP address is 192.168.2.100). -
Set
Subnet maskto255.255.255.0. -
Press
OK
Test your connection
After configuring your connection it is time to check if your connection is working.
-
Connect your controller with your pc using the configured network adaptor (In the virtual machine this is already set-up).
-
Check if your connection is established by pinging the controller by using the following command in the
terminal.ping 192.168.2.100 -c 5
Note
In case the Motorcortex Controller is configured for a different network, the settings may have to be adapted. Per default this is not the case
-
The the terminal should give you a answer that 5 packets have been transmitted and 5 received. If this is not the case please make sure you check out Connection Troubleshooting section that serves as a step by step guide.

-
Congratulations you have established a connection!