Bios Settings MCX A4+
less than a minute
Configure MCX A4+ Bios settings
This chapter describes how to configure the default bios settings for the MCX A4+:
-
Make sure the MCX A4+ is switched off.
-
Attach a keyboard (USB) and screen (HDMI).
-
Switch on the MCX A4+ and start tapping the
Deletekey until the bios menu appears. -
In the
MainscreenLoad Optimized Defaultsby pressing theF3key. SelectYes.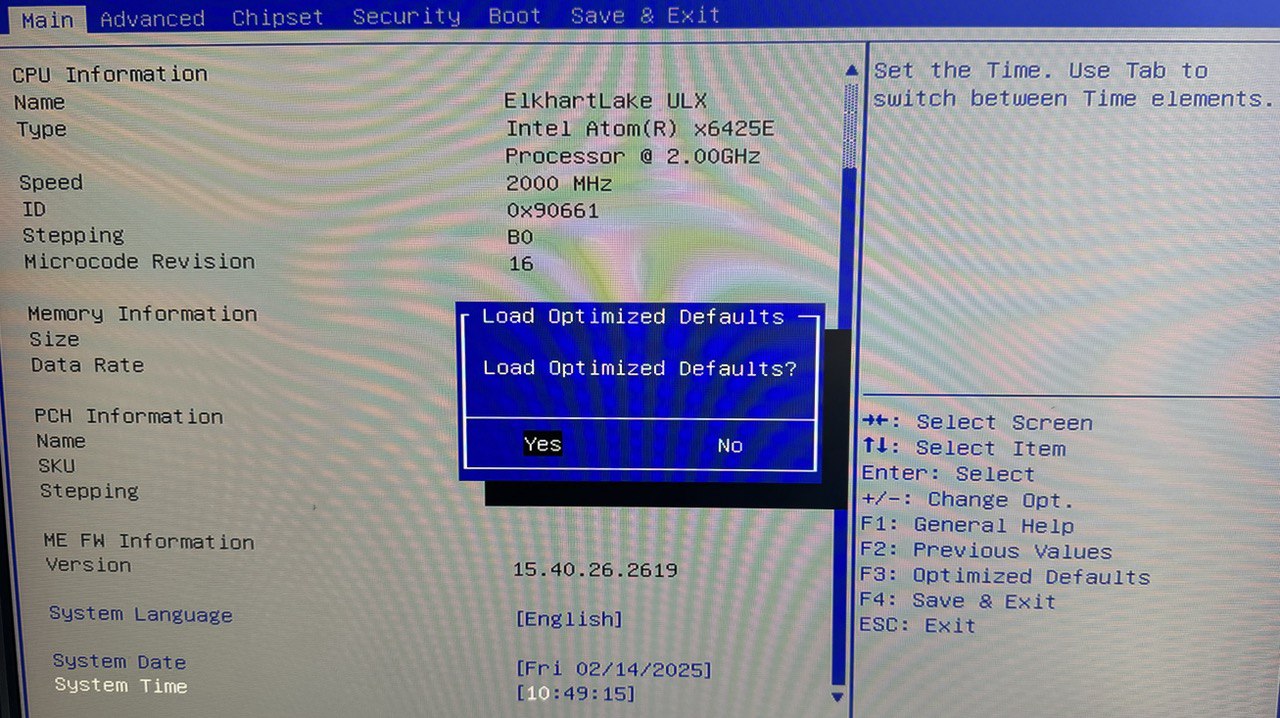
-
Make sure the
system datematches the UTC time. -
Disable
Turbo Mode: Browse toAdvanced–>Power & Performance–>CPU - Power Management Control. SetTurbo ModetoDisabled.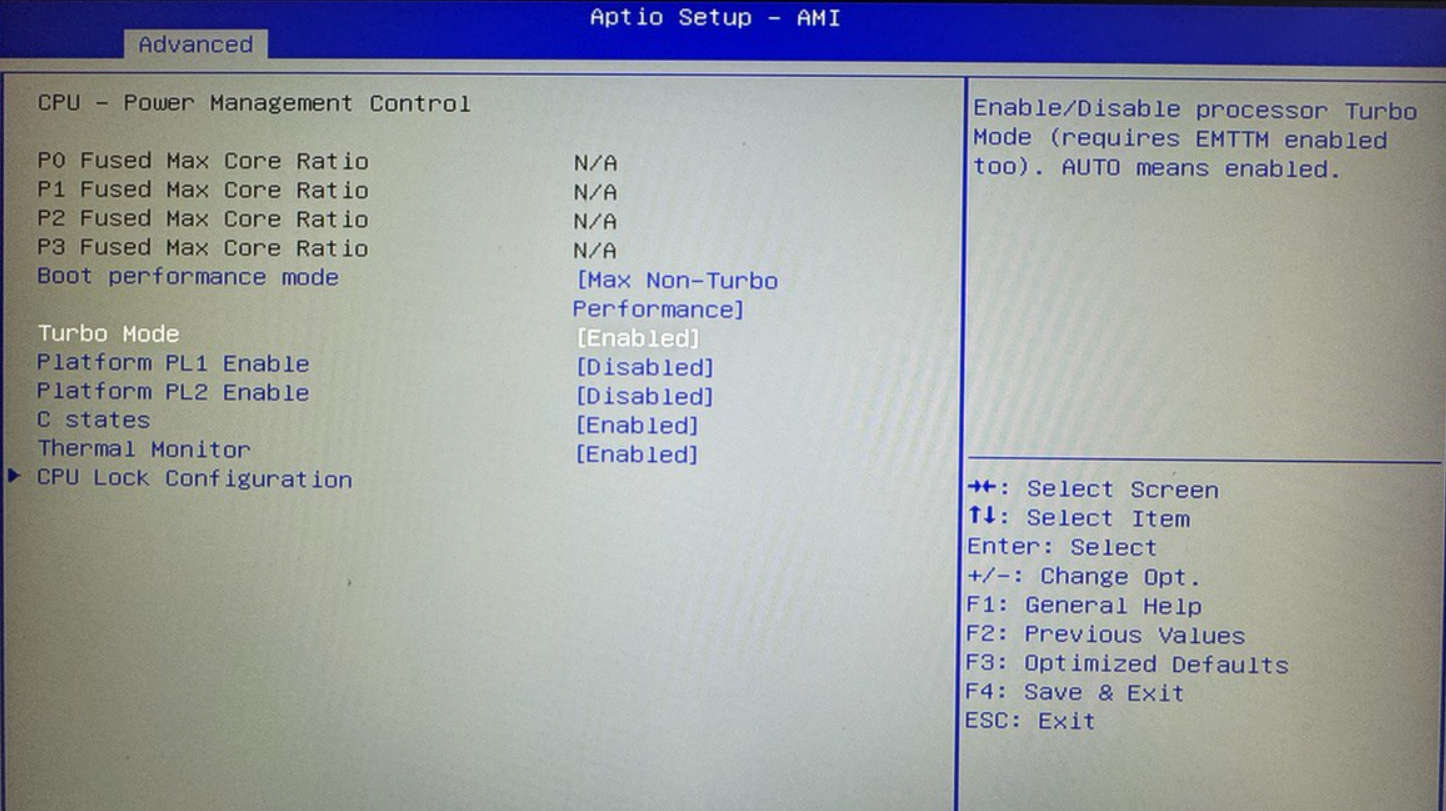
-
Disable
In-Band ECC: Browse toChipset–>System Agent (SA) Configuration–>Memory Configuration–> SetIn-Band ECCtoDisabled.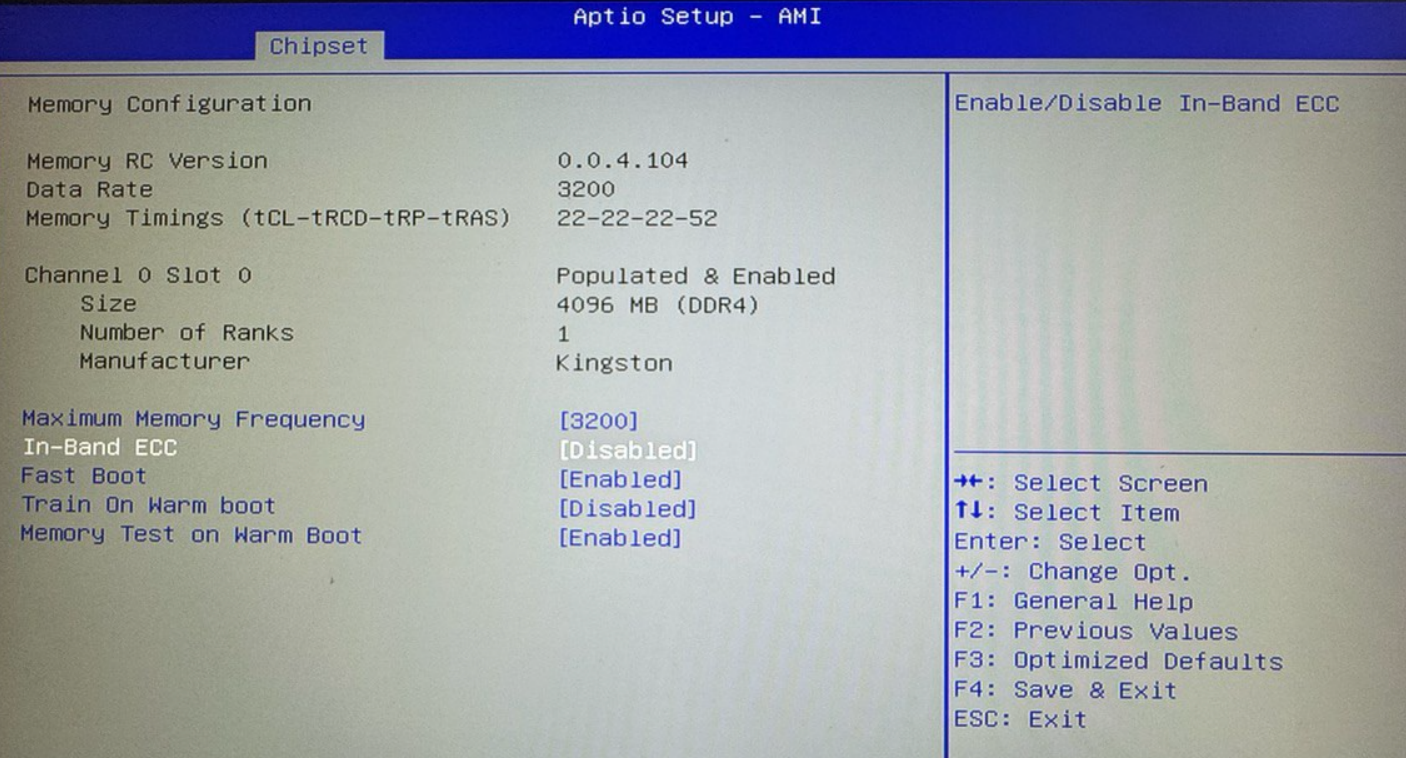
-
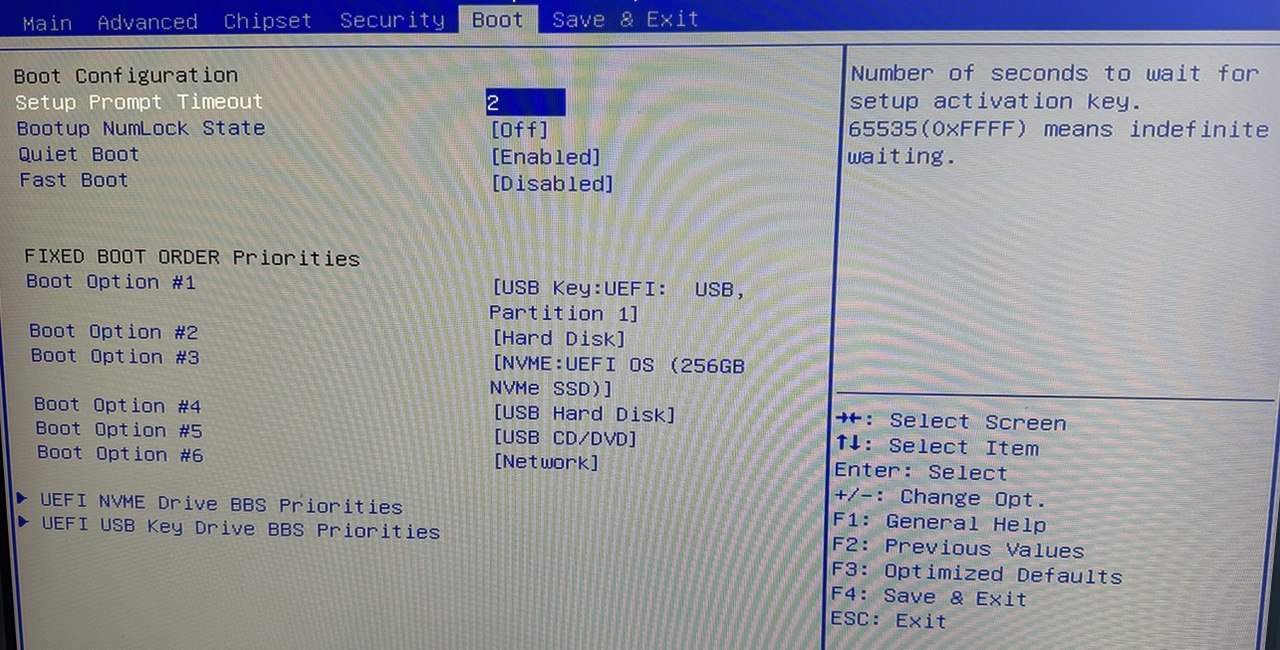
Browse to the
Bootmenu and change theBoot Ordersuch that it corresponds to the list of boot options as listed below:Boot Option #1and selectUSB Key.Boot Option #2and selectUSB HDD.Boot Option #2and selectUSB NVMe.Boot Option #3and select.....
-
Browse to the
Save & Exitmenu. -
Click on
Save Changes and Exitoption.