Cockpit is a web-based interface designed to simplify the management, monitoring, and configuration of Motorcortex systems. It provides users with real-time insights, intuitive controls, and easy access to system features, making it easier to operate and maintain Motorcortex-powered applications.
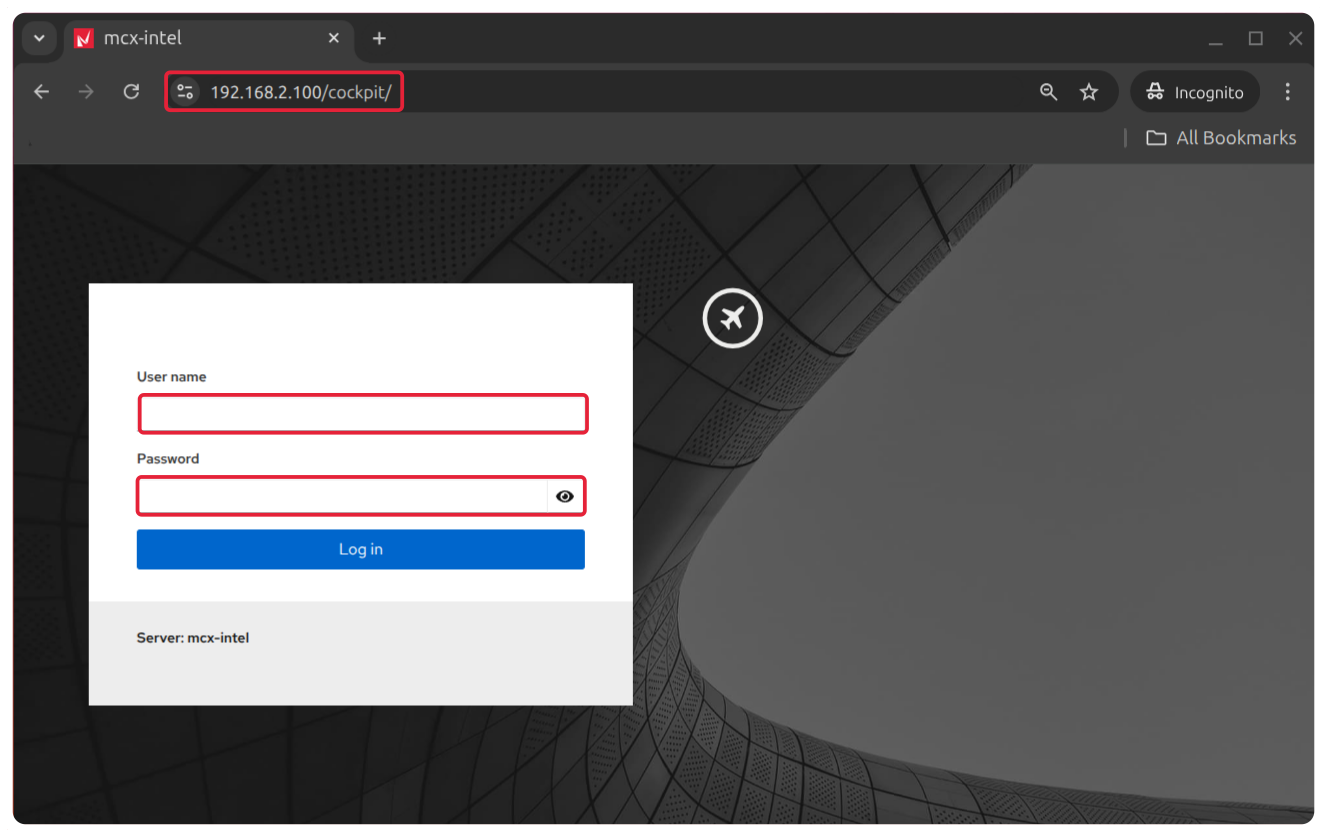
Enter the [Controller IP address] followed by /cockpit, for example: 192.168.2.100/cockpit.
Enter Log In Credentials, default username: admin, password: vectioneer.
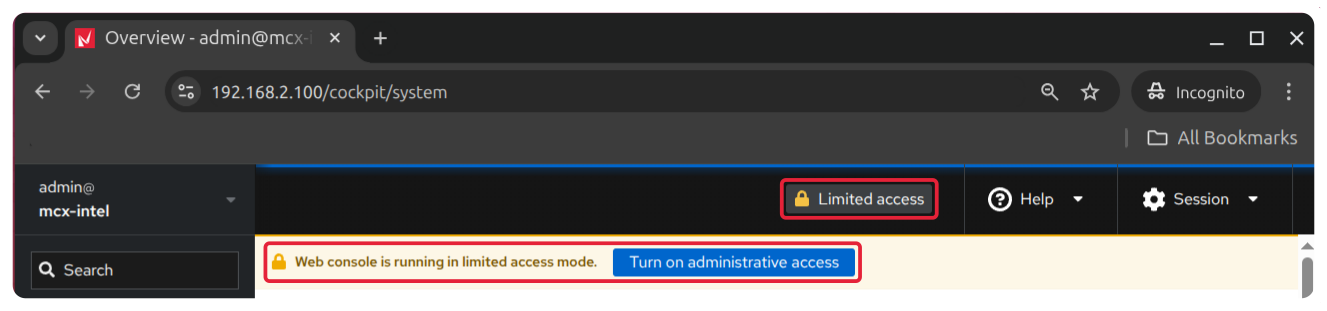
Turn On Administrative Access. After login, you see an option Turn on Administrative access. Clicking this will prompt for your password again, default password: vectioneer
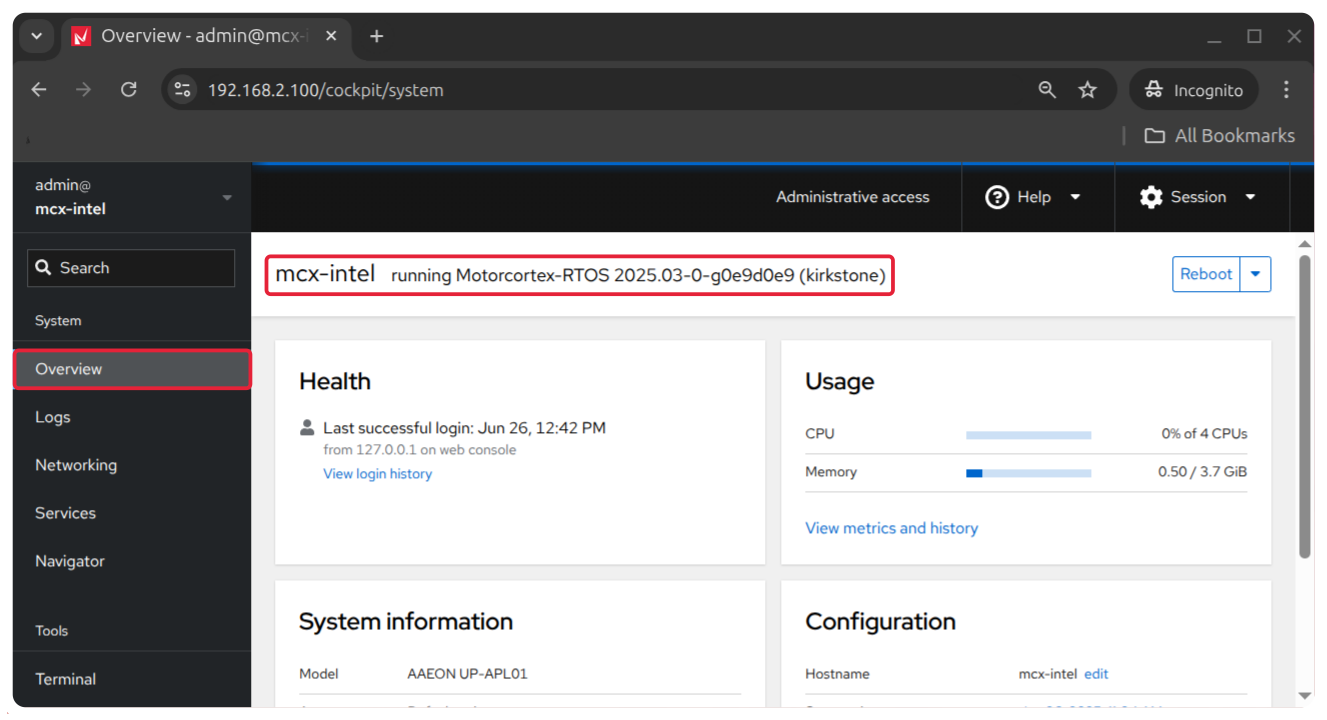
Now you are successfully logged in with administrative rights.
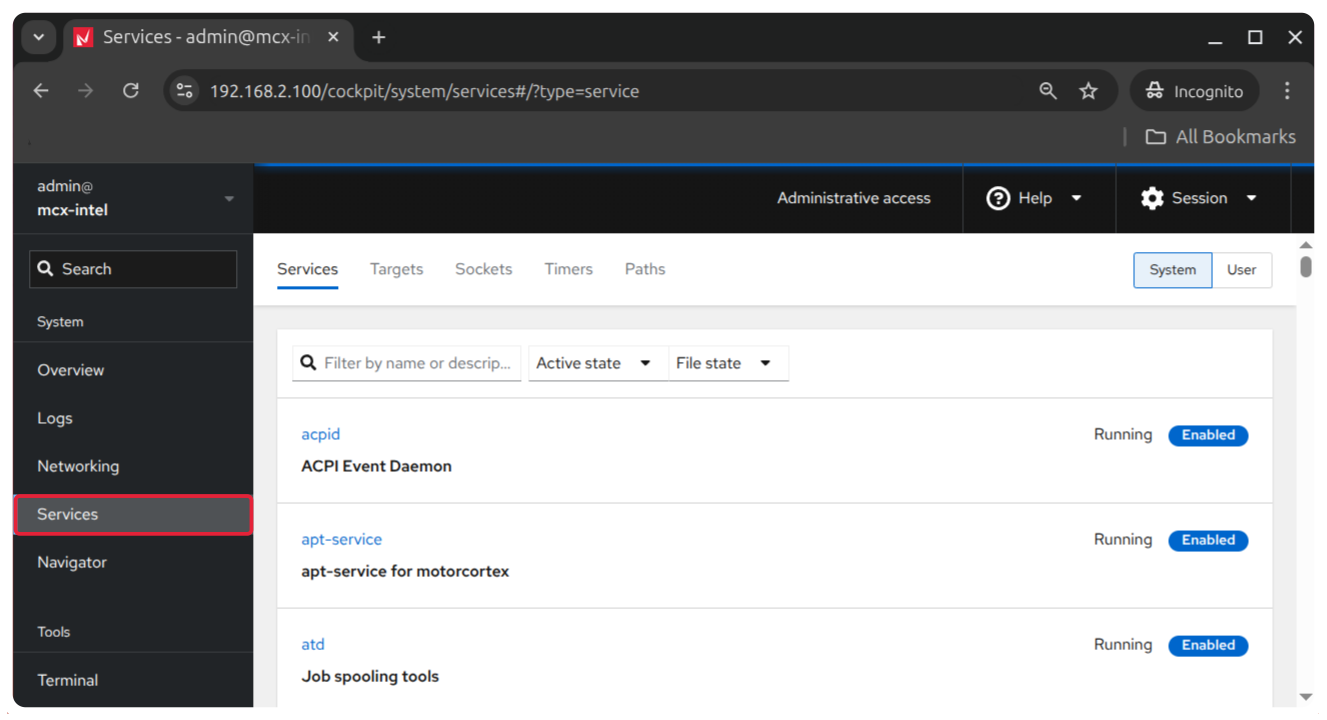
Search for specific Services. For example: Motorcortex Application.
Start, stop, restart, and check the status of services.
Checkout relationships between services and logs associated with each service.
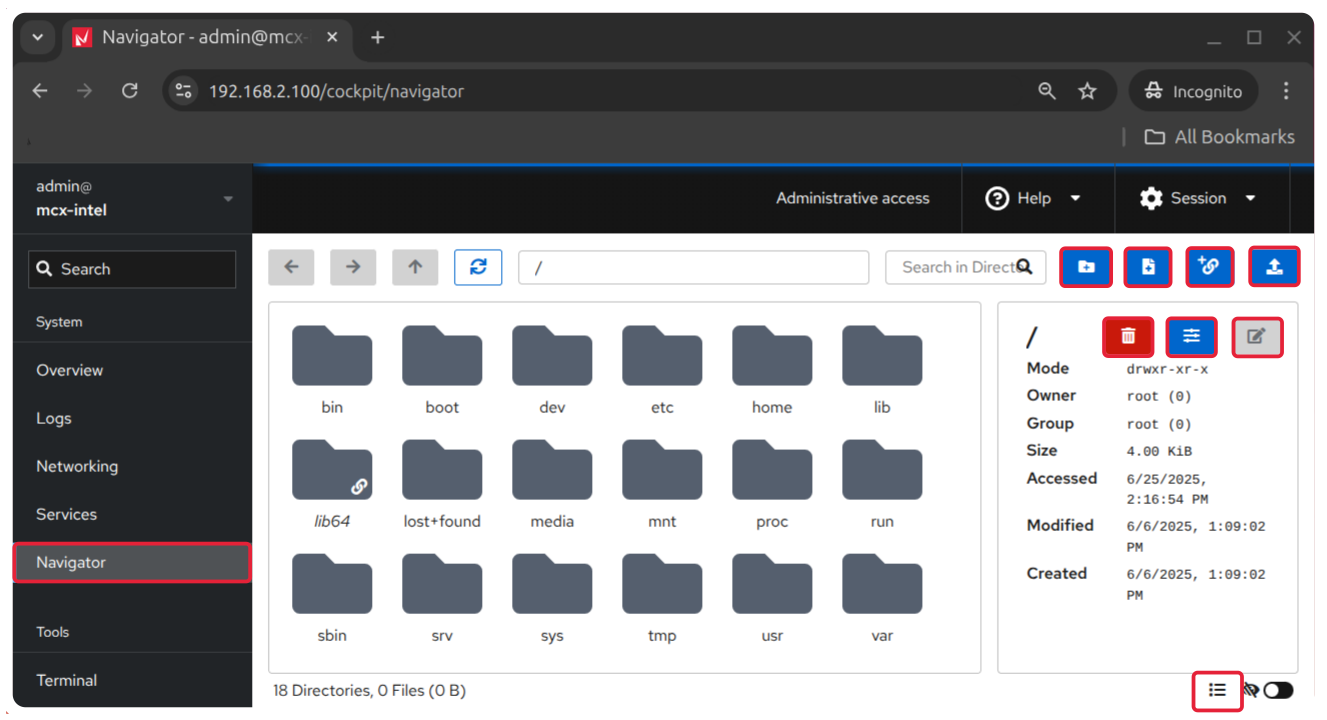
Navigator
The Navigator is a File Manager displaying your files and folders in a hierarchical tree structure, making it easy to browse through directories and subdirectories.
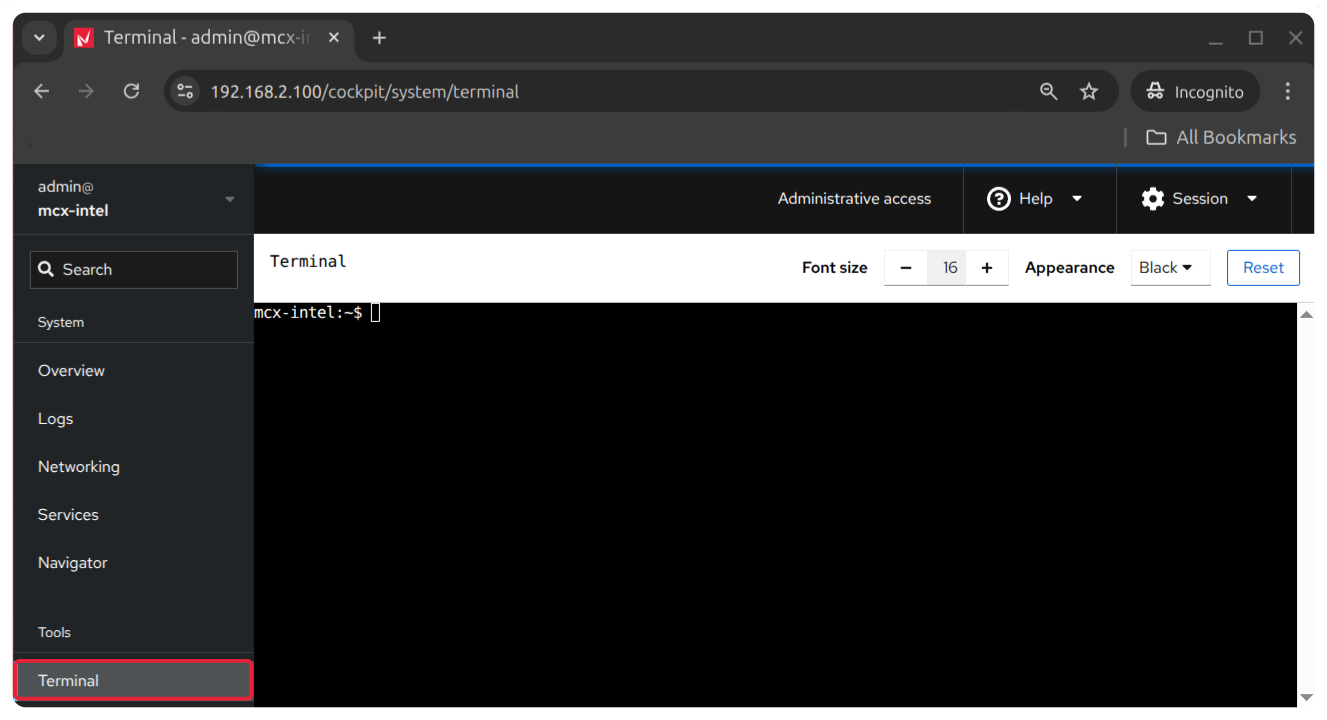
Click on Terminal to open a shell session within your browser window. This session gives you the same access as if you were logged in via SSH or directly at the console.
You can run any command that the admin privileges allow, including using sudo to perform administrative tasks.
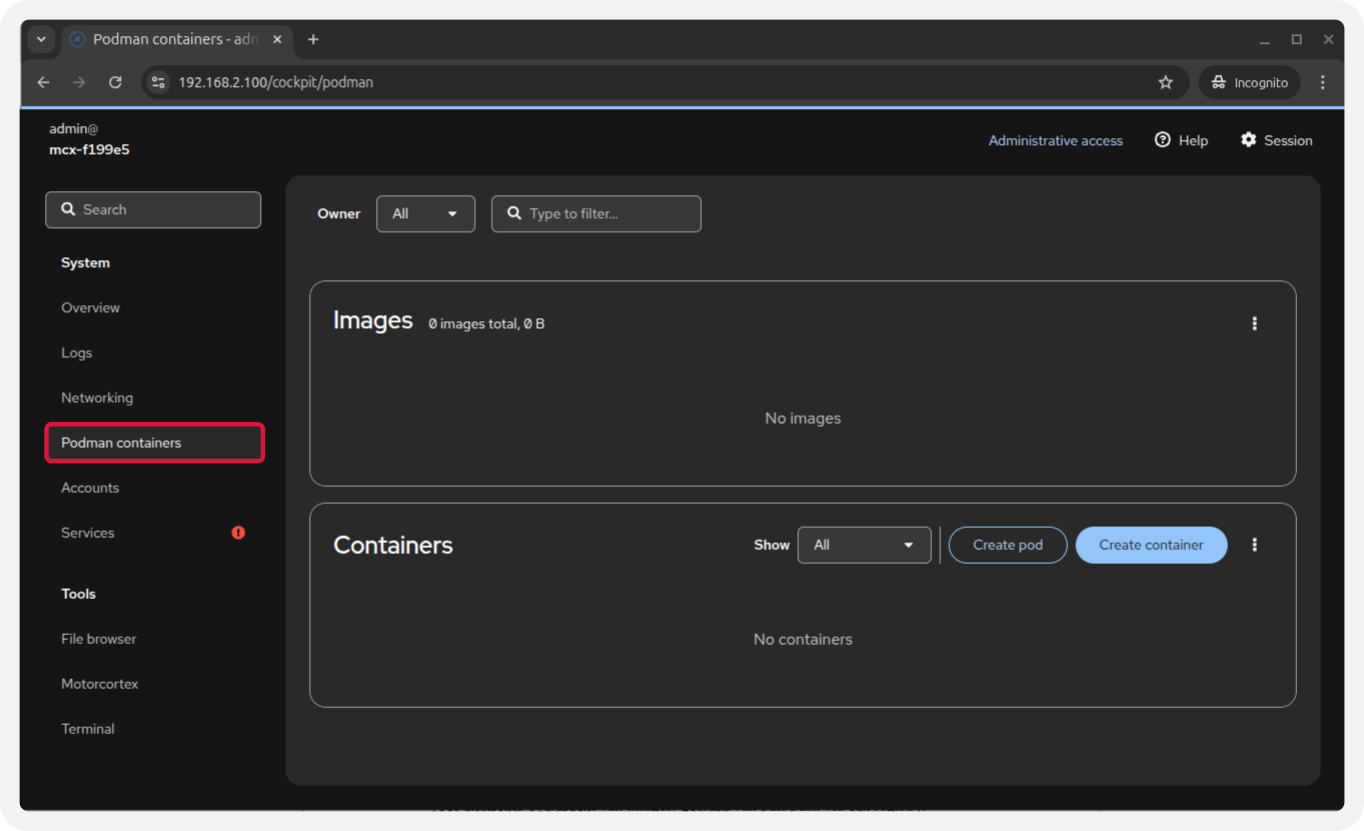
When clicking the three dots in the ‘Images’ section you can:
Pull new images from an online container registry. The controller must have internet access to pull from online registries.
Pull new updates of existing images from an online container registry.
Remove existing images not in use by a container from the controller storage.
If you want to import images from a local source, you can do this via the terminal using Podman/Docker commands.
In the containers section you can:
Create containers from images in the local storage.
Start/stop existing containers.
Remove existing containers.
Create pods to group multiple containers together.
Note
When in ‘Administrative access’ mode, all root and non-root images and containers are visible. To only manage user-specific images and containers, you need to switch to ‘Limited access’.