For Cross compilation you will need a Motorcortex SDK. You can download the SDK (Software Development Kit) from the
motorcortex.io store
Extract the archive and place the .sh file in a folder of your preference.
In the terminal browse to the folder and run the .sh file from the terminal, for example:
sh ./motorcortex-glibc-x86_64-motorcorcortex-image-dev-corei7-64-toolchain-X.X.X.sh
You will be asked to enter the target directory where to install the SDK to. It is a good idea to keep the SDK in the home folder, where administrative rights are not required for example: ~/mcx-sdk.
Mounting Sysroot on your system.
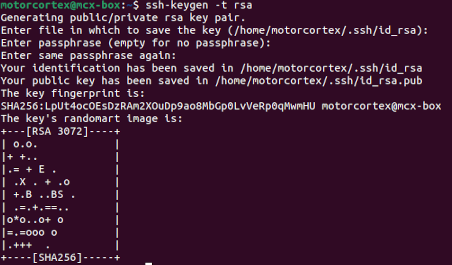
Generate a new key pair with the following command.
ssh-keygen -t rsa
Note
The prompt will ask you to set a password. This is not needed but optional if desired.
Use ssh-copy-id to install an SSH key on the remote Motorcortex host as an authorized key. Its purpose is to provision access without requiring a password for each login. To copy the SSH key you need to enter the password only once. Default password is vectioneer.
ssh-copy-id admin@controller_ip_address
Create a folder to mount the remote Motorcortex file system on with the following command.
mkdir ~/mcx-sysroot
Mount the Motorcortex file system with the following command.
You will need to execute this last command every time after you logout or reboot your development system.
Configure toolchain in CLion:
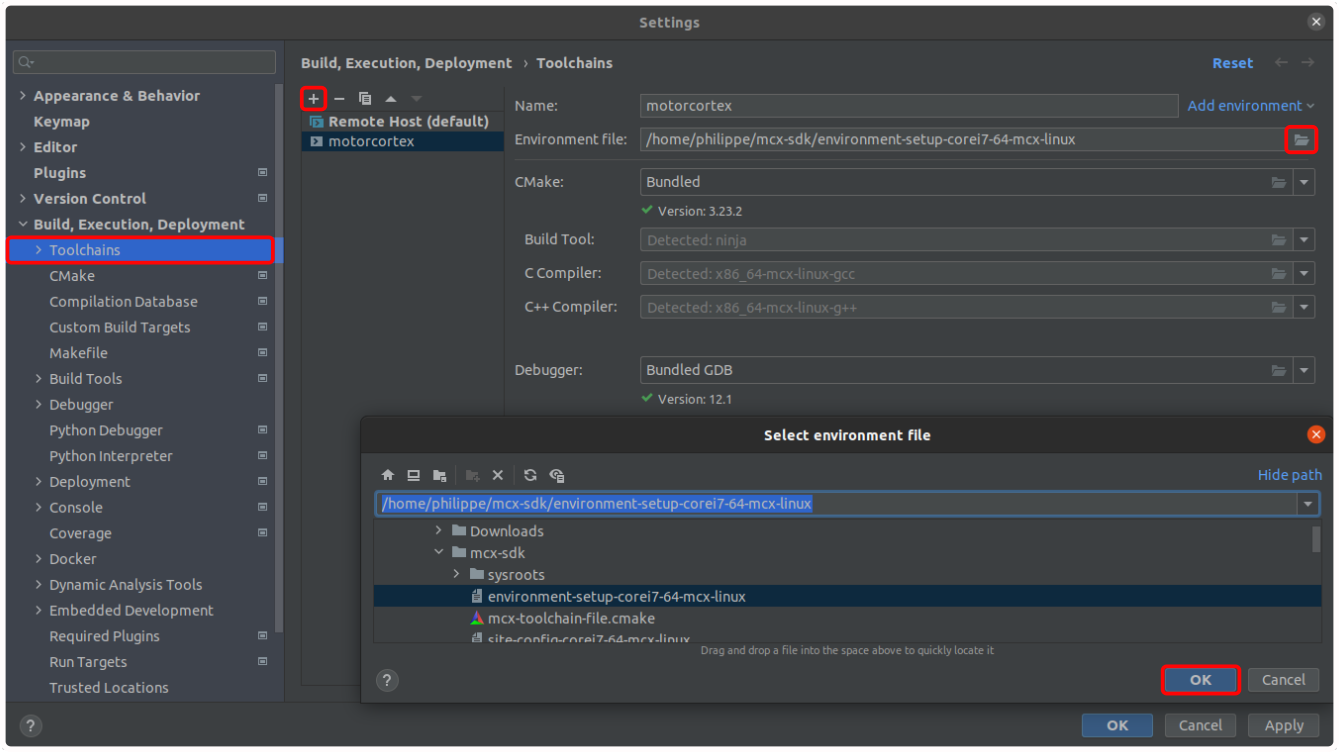
Open File → Settings → Build Execution Deployment → Toolchains.
Press to add System toolchain and name it motorcortex.
Open Add environment
→ From file.
Select environment file of the Motorcortex SDK → press OK.
CLion will fill all the required paths automatically as shown in the image above:
Cmake: Bundled
Build Tool: Detected: ninja
C Compiler: Detected x86_64-mcx-linux-gcc
C++ Compiler: Detected x86_640mcx-linux-g++
Debugger: Bundled GDB
Press Apply to save the changes.
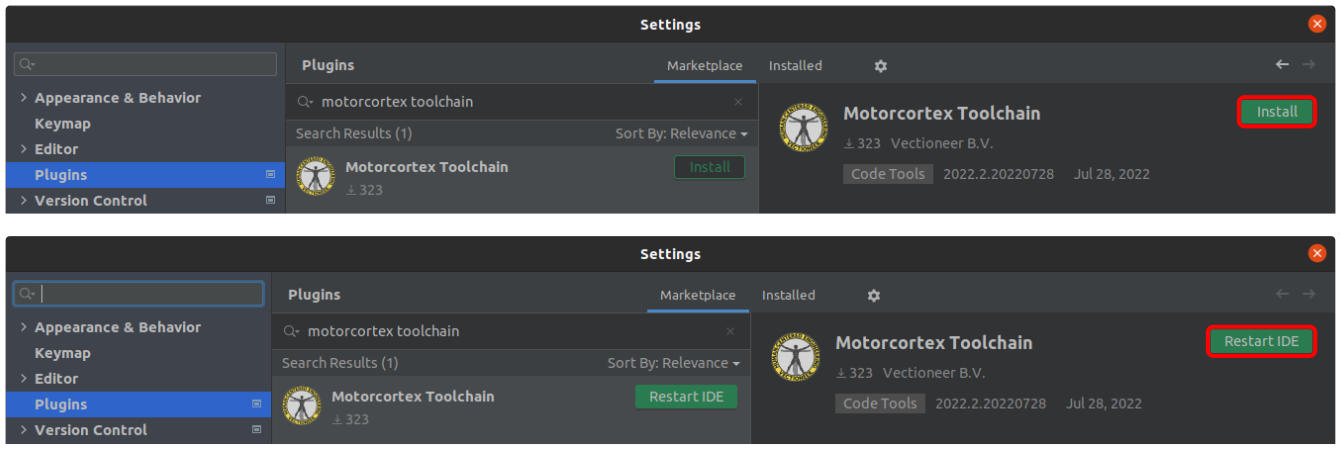
Install Motorcortex Toolchain plugin and press restart IDE → press Restart.
Open File → Settings → Build, Execution, Deployment → Motorcortex SDK and fill in the Sysroot path: with the mounted folder: mcx-sysroot.
Add the connection to the remote Motorcortex host.
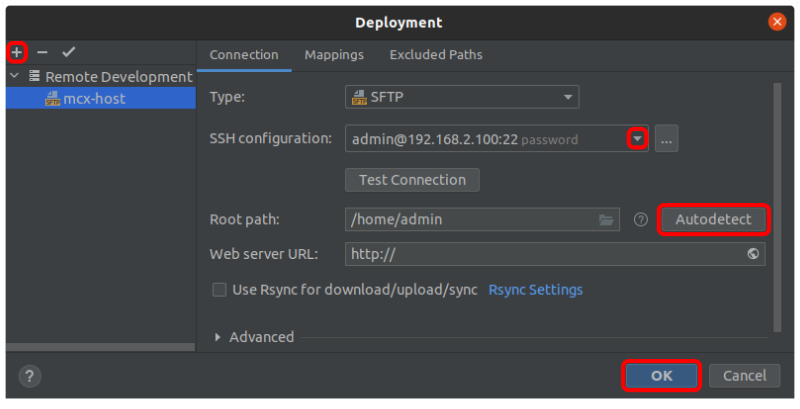
Open Tools → Deployment → Configuration...
Select Remote Development, press to add a new SFTP connection and name it mcx-host.
Setup SSH connection → press → select admin@controller_ip_address:22The IP address of your controller. In most cases 192.168.2.100..
Press Autodetect to set the root path.
Press OK
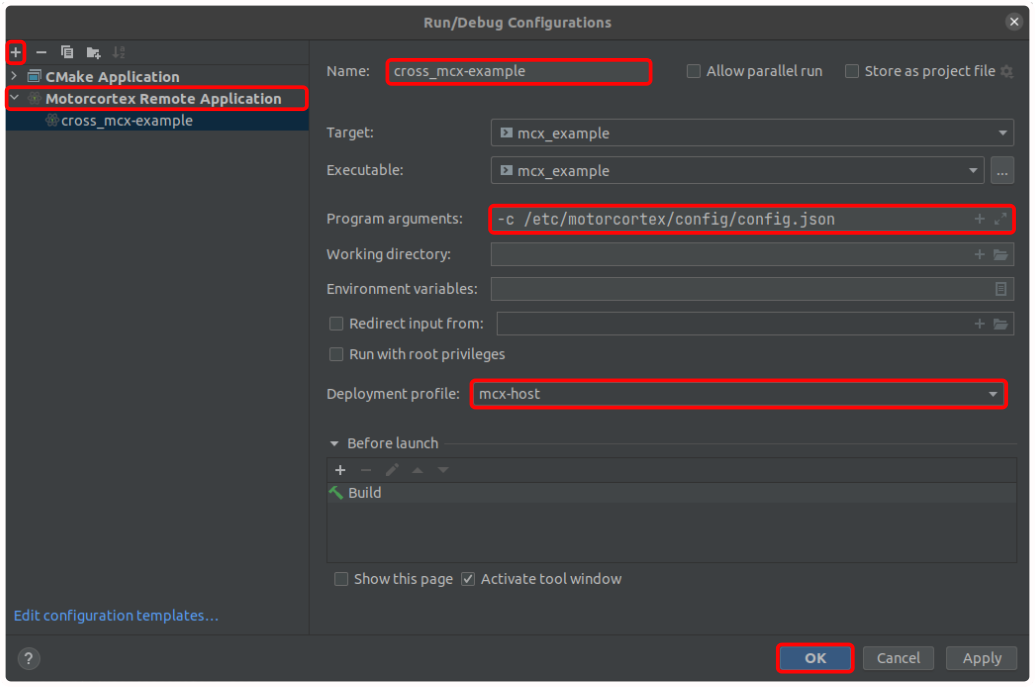
In CLion open Run/Debug Configuration, press to add Motorcortex Remote Application:
Fill in Name: of the configuration: cross_mcx-example.
Fill Program arguments with default path to the active configuration: -c /etc/motorcortex/config/config.json.
Select Deployment profile: mcx-host.
Press OK
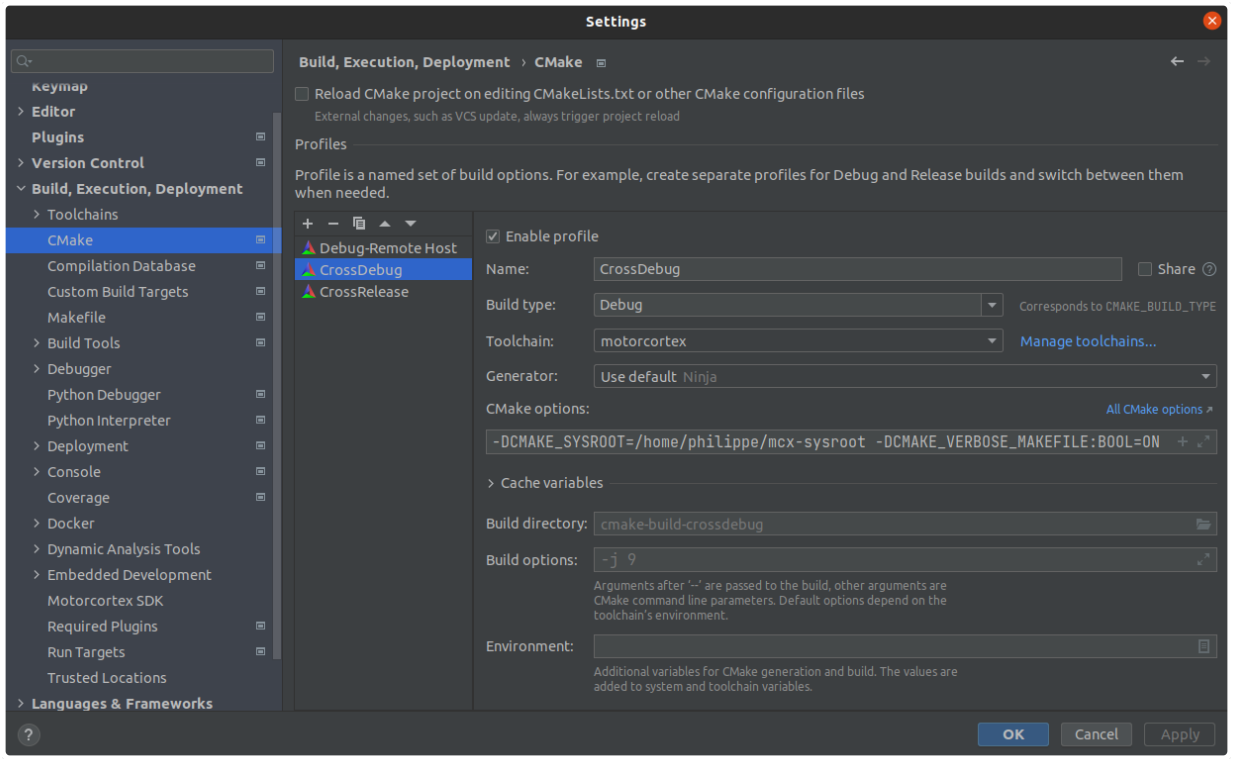
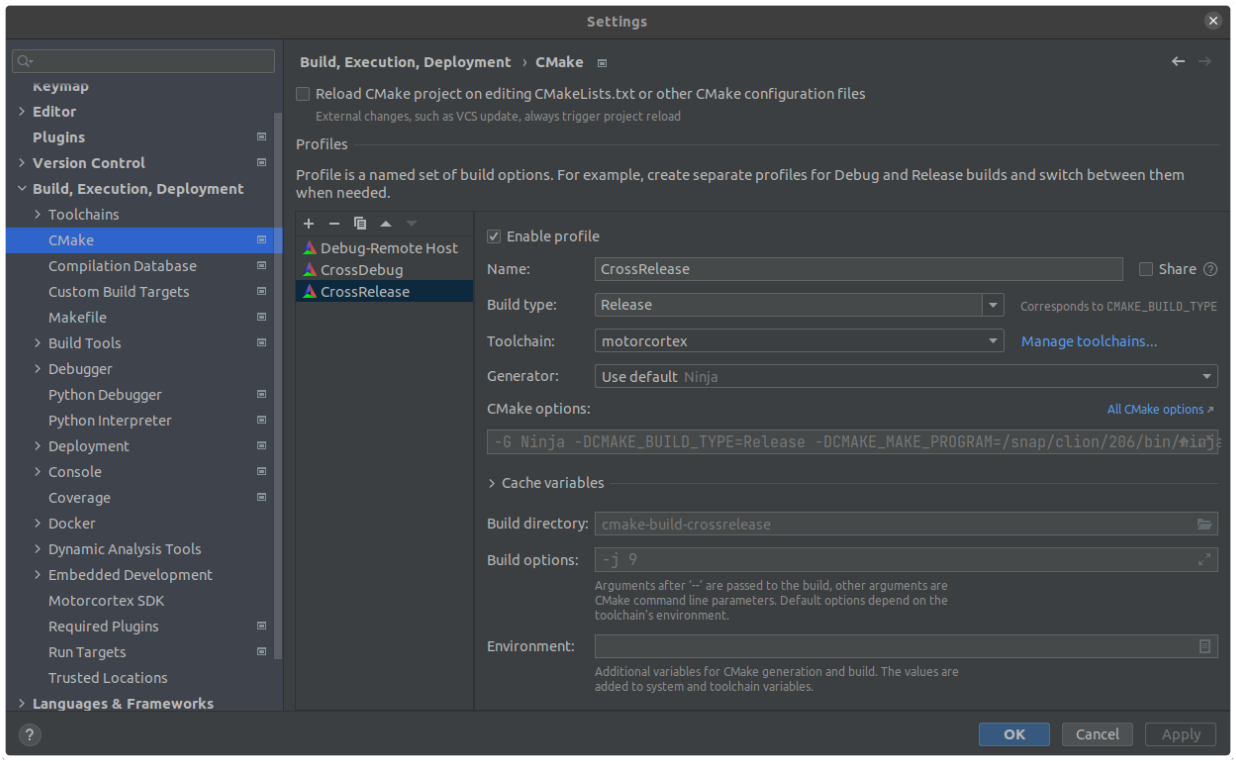
Each time a Motorcortex Remote Application is made, inside File → Settings → Build Execution Deployment → CMake, two profiles are added: CrossDebug and CrossRelease. It can happen that you accidentally delete one of these profiles, If this happens you can manually add a profile by means of pressing and fill in either CrossDebug or CrossRelease.
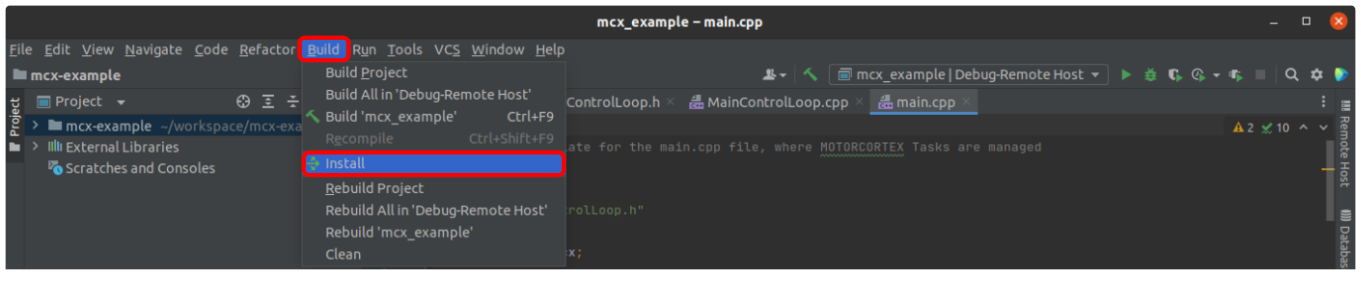
To install configuration to the controller press Build → Install.
Note
If your application is based on the Motorcortex Template example, make install command will copy the config folder to the target system to the following path /etc/motorcortex/apps-available and will create a symbolic link on the target system: /etc/motorcortex/config.
To run a project on the controller press Run icon.
To debug the project select CrossDebug configuration and press Debug.