Install on an industrial PC
8 minute read
An industrial PC runs MCX-RTOS from its internal disk. To put the image there, you boot the controller from a USB imager stick that carries the image, and the stick writes it to the disk. It takes four parts; click one to jump to it.
Before you start
- The Intel image and the imager stick image, both downloaded from the store: see Download.
- An empty USB drive of at least 8 GB.
- A keyboard and a display for the controller, or a network cable between your PC and the controller.
Create the imager stick
Warning
Writing the imager stick image erases everything on the USB drive.
Insert the USB drive into your PC, then write the imager stick image to it. Select the operating system of your PC:
Ubuntu writes the image with its Disks tool, through Disk Image Writer.
-
In your file manager, right-click the imager stick image (
…mcx-clonezilla….img.xz) and chooseOpen With›Disk Image Writer. -
In the
Restore Disk Imagewindow, setDestinationto your USB drive. Check the size and name: the wrong choice erases another disk. -
Press
Start Restoring...and confirm.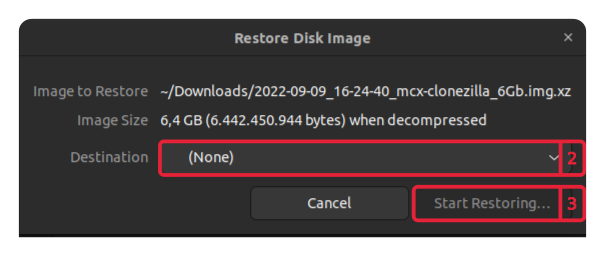
-
When writing is done, Ubuntu mounts the
ImageDatapartition of the stick.
Watch it as a video
Windows has no built-in tool to write a disk image, so you use a separate one such as Rufus.
- Install and start the disk image writer.
- Select your USB drive and the imager stick image (
…mcx-clonezilla….img.xz). Check that you picked the USB drive: the wrong choice erases another disk. - Start writing and wait until it is done.
- The stick now shows up as a drive called
ImageData.
There is no tested procedure for macOS yet. Use an Ubuntu or Windows PC to create the stick.
Copy the image onto the stick
The stick has a partition called ImageData. The imager looks there for the images it can install.
- Open the
ImageDatapartition of the stick in your file manager. - Copy the Intel image (the
.img.xzfile) into it. - Eject the stick safely before you pull it out.
Boot the controller from the stick
-
Switch the controller off.
-
Insert the imager stick into a USB port of the controller.
-
Switch the controller on. It boots from the stick.
If it starts from its internal disk instead, enable booting from USB in the controller’s BIOSThe BIOS or UEFI setup is the firmware menu of a PC, where you choose which drive it starts from. You usually open it by pressing a key such as Del or F2 while the PC starts. , or pick the stick in its boot menu.
Watch the boot and install as a video
Open the imager terminal
You give the imager its commands in a terminal. Open it on the controller itself, or from your PC over the network:
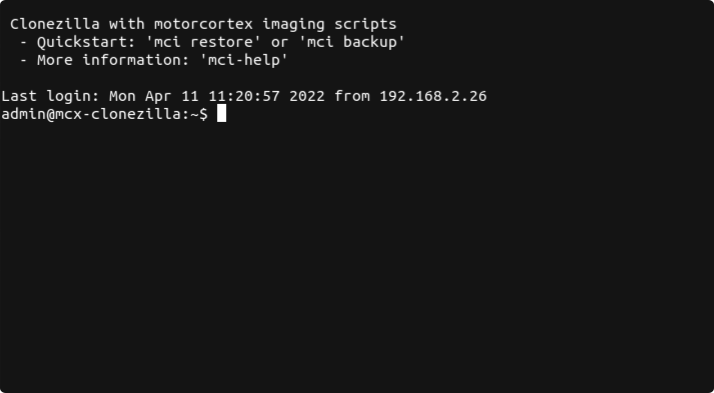
Connect a keyboard and a display to the controller. After the stick has booted, the display shows the imager terminal, ready for a command. If it asks you to log in, use the user admin and the password vectioneer.
With SSHSSH (Secure Shell) opens a terminal on another computer over the network. Ubuntu, macOS and Windows 10 and later have the ssh command built in.
you open the imager terminal from your PC, without a keyboard or display on the controller.
-
Connect your PC to the controller’s network port with a network cable.
-
Give your PC’s network adapter an address in the
192.168.2.xrange, for example192.168.2.10: see Configure your network. -
Open a terminal on your PC and connect to the controller at
controller_ip_addressThe IP address of your controller. In most cases 192.168.2.100.:ssh admin@controller_ip_address -
Log in with the password
vectioneer. The terminal shows the imager’s welcome text.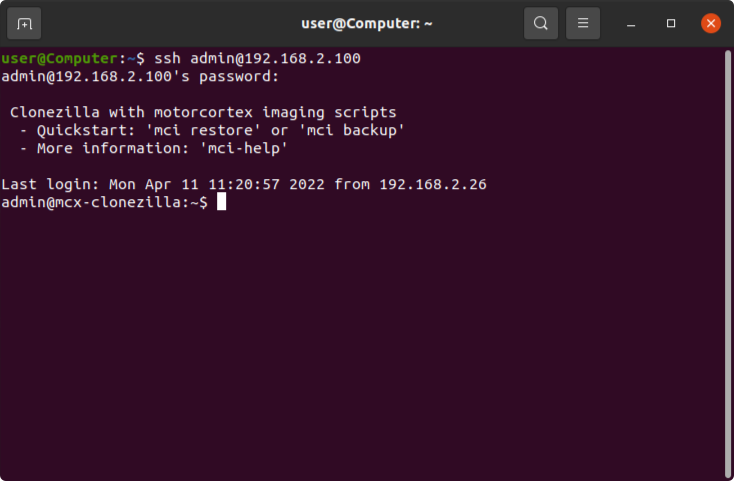
Run mci-help for more information on the imager commands.
Install the image
The imager has two commands: mci restore writes an image from the stick to the controller’s disk, and mci backup saves the controller’s disk to the stick. To keep what is on the controller now, back it up first.
Warning
Installing the image erases everything on the disk you choose. Back up the controller first if you want to keep its current software or settings.
-
Start the install:
mci restore -
Choose the image to install: the Intel image you copied into
ImageData. -
Choose the disk to install it on: the controller’s internal disk, usually
/dev/sda. The disk must be at least as large as the image. -
Wait until the imager is done, which takes a while. It ends with
Done:and the partitions of the disk.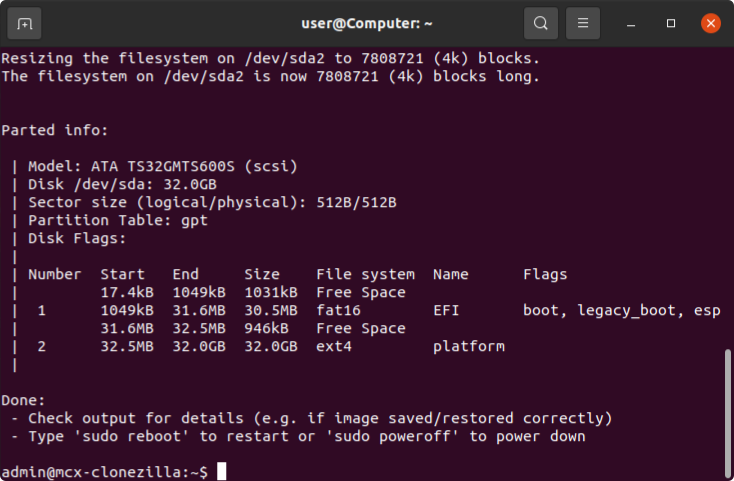
-
Check the output for errors.
-
Pull out the imager stick and restart the controller:
sudo reboot
The controller now starts MCX-RTOS from its disk.
A backup saves the controller’s disk as an image on the stick, so you can install it again later with mci restore. Make sure the stick has enough free space.
-
Start the backup:
mci backup -
Choose the source disk: the controller’s internal disk, usually
/dev/sda. -
Choose the target directory on the stick. The imager offers a new directory named after the date and time, for example
/mnt/usb/2026-01-06_15-44-42_mci-fsa-image.Choose Source Device: 1) sda /dev/sda ... Choose Target Image Directory: 1) /mnt/usb/2026-01-06_15-44-42_mci-fsa-image (new directory) ... Done -
Wait until the imager shows
Done. -
Pull out the imager stick and restart the controller:
sudo reboot
The backup is a directory of filesystem archives, not a raw disk image. mci restore can install it, but a virtual machine such as QEMU cannot start from it.
Make a raw disk image for QEMU
A raw disk image is one file with the whole disk in it, which QEMU can start. You make it by restoring the backup into an empty image file on the stick. The stick needs room for the backup and for the full image file, 6 GB in this example.
-
Go to the stick and check it is mounted:
cd /mnt/usb ls -lart -
Create an empty 6 GB image file:
truncate -s 6G temp.img -
Attach it as a loop device and see which one it got:
sudo losetup -fP temp.img
losetup -a
/dev/loop1: []: (/mnt/usb/temp.img) -
Back up the controller as above with
mci backup, if you have not done so yet. -
Restore the backup into the loop device. Use the loop device from step 3:
mci restore -d /dev/loop1 -
Check that the loop device now has partitions:
lsblkNAME MAJ:MIN RM SIZE RO TYPE MOUNTPOINTS loop1 7:1 0 6G 0 loop ├─loop1p1 259:2 0 34M 0 part └─loop1p2 259:3 0 6G 0 part -
Detach the loop device:
sudo losetup -d /dev/loop1 -
Check the partition table of the image file:
fdisk -l temp.imgDisklabel type: gpt Device Start End Sectors Size Type temp.img1 2048 71615 69568 34M EFI System temp.img2 71616 12582847 12511232 6G Linux filesystem
temp.img is now a raw disk image. You can start it in QEMU: see Run a virtual machine.
Next: Step 2: connect your PC.