VS Code
7 minute read
The Motorcortex VS Code extension scaffolds a C++ control application, sets up a cross-compilation toolchain, and builds, runs and debugs the application on a target.
Work through the tabs in order: create the project, then set up a toolchain. Settings and Troubleshooting are references you come back to.
Installing the Motorcortex extension
The installation guide for the Motorcortex VS Code extension is in Software features.
Setting up the project
The extension acts on the project type it detects, so start by creating a project or marking an existing folder as one.
Click the + button in the Developer tools section of the Motorcortex view and choose the C++ control application, or run Motorcortex: Create C++ MCX Control App from the Command Palette (ctrl+shift+p). This creates a folder with the files and structure of a Motorcortex control application.
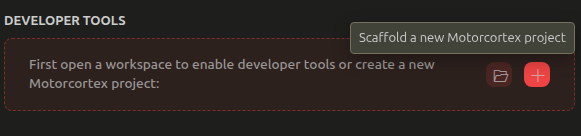
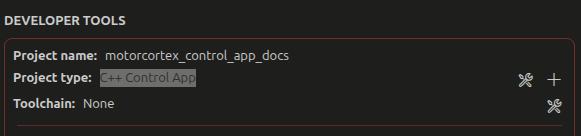
Open the new folder in VS Code. The Developer tools section now shows the project name and reports its type as a C++ Control App.
Setting up the toolchain
There are three ways to build, depending on your development setup:
-
Cross-Remote toolchain, build on local (preferred)
Builds the application on your local machine and deploys it to the target to run. Uses the Motorcortex cross-remote SDK.
-
Cross-Remote toolchain, build on target
Builds the application on the target while you develop locally. Uses the Motorcortex cross-remote SDK for IntelliSense.
-
Remote toolchain (Remote Development), build on target
Builds and runs the application on the target while you develop locally. Uses the VS Code Remote Development extension pack, which the Motorcortex extension installs as a dependency.
Both Cross-Remote options share one setup; where the build runs is a choice you make afterwards in the extension.
Cross-Remote toolchain
This is the preferred way to develop Motorcortex control applications remotely. It uses the Motorcortex Cross-Remote SDK for IntelliSense and build support on your local machine, and deploys and runs the application on the target device.
Prerequisites
Download the latest Motorcortex SDK for your system from the
Motorcortex store, for example mcx-rtos-glibc-x86_64-mcx-image-dev-corei7-64-mcx-intel-toolchain-2025.03-0-g0e9d0e9.sh.
Installing
-
Press the
Configure Toolchainbutton in the Motorcortex view and chooseCross-Remote.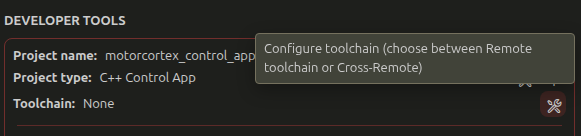
-
Choose whether to use a DevContainer. A DevContainer is recommended: it gives a consistent environment, is built into VS Code and works cross-platform. Without one, install the required dependencies on your local machine yourself.
-
Configure the remote path and the executable name.
- Remote path: the path on the target where the executable and configs are synced to run and debug. Building on the target syncs the whole workspace to this path.
- Executable name: the name of the executable built and run on the target. Match the name in your
CMakeLists.txt.
-
Select the file for the option you chose in step 2.
- DevContainer: the SDK installer,
**.sh. - No DevContainer: the environment setup file in the installed SDK folder —
mcx-cmake-environment, or anenvironment-setup-*file on an older SDK.
- DevContainer: the SDK installer,
-
Open the DevContainer, if you chose one, with the
Reopen in Containerbutton at the bottom right of VS Code. -
Select the CMake kit:
ctrl+shift+p→CMake: Select a Kit→MCX Cross-Compile Toolchain.
Usage
You can now build, run and debug your control application with the VS Code build and debug features, and the extension handles deployment and execution on the target. The Developer tools section of the Motorcortex view carries buttons for the same actions.
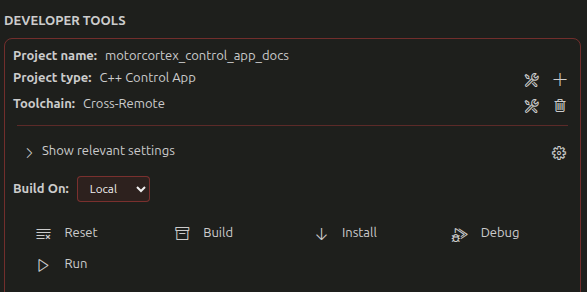
The buttons drive tasks and launch configurations that the extension writes into the .vscode folder, so the same workflow is available through the native VS Code UI.
Remote toolchain
This way of developing Motorcortex control applications runs entirely on the target machine, and only the VS Code UI runs locally. The files live on the target, and the terminals inside VS Code run there too, so working with Git needs care.
Installing
-
Open the
Remote Explorerand selectRemotes (Tunnels/SSH)in the top bar: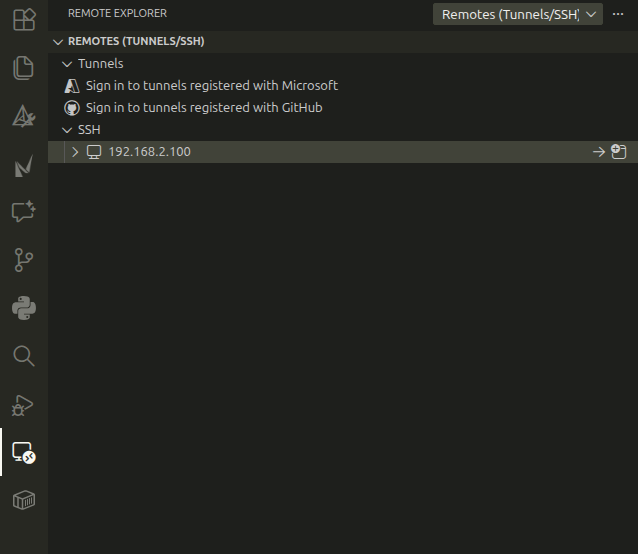
-
Add a remote with the
+icon next toSSH, and follow the prompts to set up an SSH connection to your target machine. -
Open the new SSH connection, in the current window or in a new one.
-
Install the Motorcortex extension again, on the remote.
-
Transfer your project files to the target machine, or create a new project there.
-
Press the
Configure Toolchainbutton in the Motorcortex view and chooseRemote toolchain.
-
Enter the name of the executable. Match the name in your
CMakeLists.txt.
Settings
The Developer tools section of the Motorcortex view shows the settings relevant to the selected toolchain, and you can change them there directly.
Note
Changing some settings raises a notification about what the change affects. Read it before continuing.
The settings that apply to both toolchains:
motorcortex.targetIp— IP address of your Motorcortex Target controllermotorcortex.targetUsername— SSH username for your Motorcortex Target controllermotorcortex.cpp.default_args— default program arguments when running or debuggingmotorcortex.cpp.executable_name— name of the executable to build and run on the target controllermotorcortex.cpp.crossRemoteToolchain.remote_path— remote path on the controller where files are syncedmotorcortex.cpp.toolchain_base_path— base directory holding the installed toolchainsmotorcortex.cpp.environment_setup_path— path to the SDK environment setup script, detected during toolchain setupmotorcortex.cpp.cmake_toolchain_path— path to the CMake toolchain file for cross-compilingmotorcortex.cpp.additional_cmake_args— extra CMake arguments for the configuration stepmotorcortex.cpp.mcx_packaging_install_prefix— path prefix for installing MCX Packaging on the target
The full list, including the Python client settings, is in VS Code settings.
Troubleshooting
MainControlLoop.h: No such file or directory
You are compiling with g++ directly. Use the CMake build tasks instead.
mcx/core.h: No such file or directory
- Check that the SDK is installed correctly if you are using the Remote toolchain.
- Check that Motorcortex is installed on the controller. Deploy an application from the Motorcortex Portal if you are using the Remote Development toolchain.
- Check that
motorcortex.cpp.cmake_toolchain_pathpoints at the SDK toolchain file. - If the build succeeds but IntelliSense fails, select the CMake kit:
ctrl+shift+p→CMake: Select a Kit→MCX Cross-Compile Toolchain.
Cannot find the executable when debugging
- Build first, with
Ctrl+Shift+B. - Check that
build/**-debug/<executable_name>orbuild/**-release/<executable_name>exists, where<executable_name>is themotorcortex.cpp.executable_namesetting.
Breakpoints not working (red or unbound)
- Use the Debug configuration, not Release.
- Delete the build folder and rebuild:
rm -rf build/debugfollowed byCtrl+Shift+B.
Failed to start the listener for URL: wss://*:5568 (Address in use)
- Check that Motorcortex is not running:
sudo motorcortex stop. - Check that no other instance of your program is running.
Building takes a long time
- Check that Motorcortex is not running:
sudo motorcortex stop. - Check that no other instance of your program is running.